Another Legio Astorum Warhound Titan marches out of the forge fires of the Pirate Viking Painting mechanicus workshops:
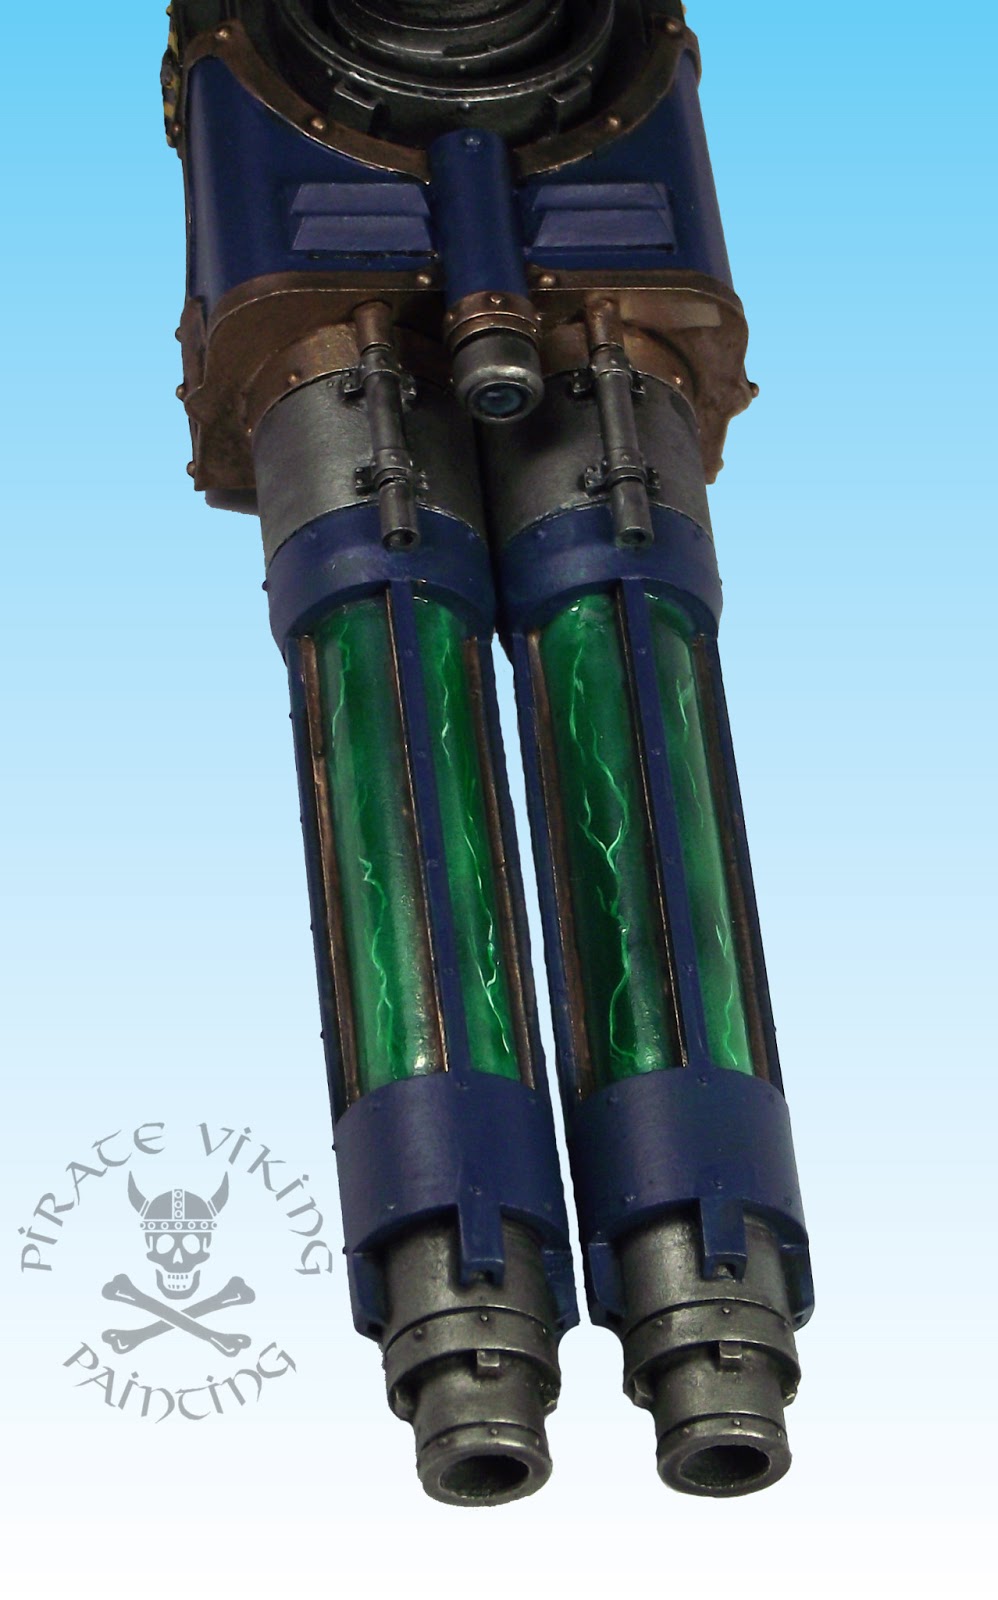
This one is Triari Sinister, the third Legio Astorum commission I've completed. Kinda feel like I'm building the whole Titan Legion one by one ;) . Lets check out some glamour shots:
Unlike the previous titans, this was mostly blocked in with an airbrush, made getting a nice solid, smooth blue a breeze. The yellow is Minitaire "Craven" over white with shading provided by Casadora Yellow.
I like this configuration of Warhound, Vulcan Mega-Bolter to strip shields and a Turbo-laser Destructor to provide the killing blow to enemy engines. Works just as well on smaller things too! I'm getting the hang of the "energised plasma" look on the TLD's too. Essentially you mist on white over a black undercoat with an airbrush. Add lightning in white and then once nice and dry, glaze with a couple of heavy coats of green ink through the airbrush. Finish with varnish or water effects to create the armoured glass containment vessels.
The heraldry was once again drawn from the pages of Imperial Armour. Freehand flames for the forward carapace and airbrushed white discs as the foundation for the legio "black star" markings. You then add the radial lines of the starburst freehand in white - make sure you go for anything other than 8 points or it looks like secret chaos affiliation, mine are 12 - and then paint the black disc in to finish it off. If you look, I've added the mechanicus discs that come in the kit to the shoulder mounts. This is going to sound crazy, but... despite the fact that the three titan's I've painted are for two different clients, I wanted minor structural differences between the three.
I love the effect of the engine deck beneath the grill. Gives a nice realistic air to the model. Looks ace.
So now to crate this bad boy up and deliver him unto the waiting hold of the good starship Royal Mail. The lower incidence of content on the blog lately has been mostly because of the time huge figures take to complete so hopefully there should be a resurgance of nifty models on the blog soon!
TTFN
Showing posts with label Titan. Show all posts
Thursday, 18 July 2013
Friday, 14 June 2013
Workbench: Warhound 3!
Hi folks, its been a little quiet here lately which usually means that I've started something large and time consuming and this week is no exception...
Yup, I'm painting another warhound! The client saw Pyladii Alpha and Beta and wanted one of his very own. Its going to be another from the Legio Astorum too (Triarii Sinister) so I've had some practice! This week has been all about cleaning and fitting the sub assemblies and painting the interior of the torso. If you are doing one of these then seriously. Leave about two days for assembly. The legs alone take almost a day.
With the interior, I'd learned from experiance and left the torso section in fore and aft halves. Made it much easier to get the brush in. Still not easy but easier. The Val Grey-Green gives a nice "institutional paint" colour and feels like the sort of colour you paint things that aren't meant to be seen by the public. The dirt and oil around the floor give it some character and age.
The engine section is simarily cramped. You'll notice a variable quality in the painting, some it fairly clear, some just give an impressionist feel. Why? Because once the two halves are together and the connecting wall in place visability is really, really reduced.
One thing that I've adored about this model is in the roof, the grilled opening to exposed engine parts:
It's really hard to photograph well but enlarge the picture and take a look. The grill is an etched steel part that covers the resin componants beneath. It's an awesome effect and if you ever get a chance to see one of these in the flesh then check it out. Really nice.
Thats it for today, started painting the legs, more to follow!
TTFN
Yup, I'm painting another warhound! The client saw Pyladii Alpha and Beta and wanted one of his very own. Its going to be another from the Legio Astorum too (Triarii Sinister) so I've had some practice! This week has been all about cleaning and fitting the sub assemblies and painting the interior of the torso. If you are doing one of these then seriously. Leave about two days for assembly. The legs alone take almost a day.
With the interior, I'd learned from experiance and left the torso section in fore and aft halves. Made it much easier to get the brush in. Still not easy but easier. The Val Grey-Green gives a nice "institutional paint" colour and feels like the sort of colour you paint things that aren't meant to be seen by the public. The dirt and oil around the floor give it some character and age.
The engine section is simarily cramped. You'll notice a variable quality in the painting, some it fairly clear, some just give an impressionist feel. Why? Because once the two halves are together and the connecting wall in place visability is really, really reduced.
One thing that I've adored about this model is in the roof, the grilled opening to exposed engine parts:
It's really hard to photograph well but enlarge the picture and take a look. The grill is an etched steel part that covers the resin componants beneath. It's an awesome effect and if you ever get a chance to see one of these in the flesh then check it out. Really nice.
Thats it for today, started painting the legs, more to follow!
TTFN
Wednesday, 27 March 2013
Brother Titans
I am more than a little excited to post this picture as it represents the end of nearly 2 months work:
Hooray! They are all kinds of done! With a bit of light weathering (the client didn't want them all war torn so just mucky from a fairly recent deployment) my work on the Legio Astorum comes to a close. That makes 2 knights (chas and dave apparantly) and a pair of warhound titans. Lets check out some pretty pictures:
Pyladii Alpha is armed with a titan killing turbo laser and one whacking great flamethrower. I posed it to be aiming its engine-slaughtering gun at roughly where the midsection of one of the larger titans that these lads hunt would be situated. The midsection is where the reactor is housed in the fluff y'see.
The titans are actually a little muckier than they look. The subtle dust weathering was rather cut through by the lights.
I wanted to talk for a moment to praise whoever designed this model for the feet. They are brilliant. Lots of fiddling to get them right but it means you can pose the feet however you want. I recommend building supporting the "sole" section of the foot at the angle you want it at before attaching the toes. In this case a roll of masking tape gave be the required height. I wanted to show Alpha placing its left foot down and is about to transfer its weight flattening the foot and taking the next stride. Beta is more extreme as we will see later.
You can just see the cabling attached to the turbo laser. These gave me one hell of a hassle this time around. All of the supplied cabling snapped while I tried to bend it. In the end I scavenged bin ends of the previous titan's cabling and managed to use those. Christ alone knows what was wrong with these ones. Maybe it was too blummin' cold in the workshop. Who knows?
While it is tough to see the dust weathering on the legs came out really, really nicely. I'm using a new - for me - system of enamel weathering paints from AK Interactive. I misted them on in layers with the airbrush until the dust had built up. A mix of Dust Effects and Kursk Earth (which as a 2000AD fan I kept reading as Cursed Earth) made a nice concrete dust effect to match the urban basing that I have done for all of this client's other models.
More AK effects give us the nice streaking grime under the brass edging. I'll do a tutorial on how this stuff works soon as I am pretty much competant now.
And finally, more AK stuff in the form of rust streaks run around the dome rivets and then 'stumped' with white spirits. Again, I'll talk more of these soon.
Beta is a bit more mucky, with more weathering powders used on the carapace. I've already shown lots of piccies of Beta before so I shall let this image of it's weathered state do it!
Finally, I played around with some photoshop trickery to accomodate another client request. For his titans to be actually stalking around some ruins:
I've done three, the other two are below. I'm not sure which I like best! What do you folks think?
So that is it, titans done! Next is finishing off the Purple Marines project in the form of six yes, you heard me, six predators and a few land speeders! Apparantly won't be the only titan commission though as there is another chap intrigued by the thought of a PVP titan of his very own. Until next time folks
TTFN
Hooray! They are all kinds of done! With a bit of light weathering (the client didn't want them all war torn so just mucky from a fairly recent deployment) my work on the Legio Astorum comes to a close. That makes 2 knights (chas and dave apparantly) and a pair of warhound titans. Lets check out some pretty pictures:
Pyladii Alpha is armed with a titan killing turbo laser and one whacking great flamethrower. I posed it to be aiming its engine-slaughtering gun at roughly where the midsection of one of the larger titans that these lads hunt would be situated. The midsection is where the reactor is housed in the fluff y'see.
The titans are actually a little muckier than they look. The subtle dust weathering was rather cut through by the lights.
I wanted to talk for a moment to praise whoever designed this model for the feet. They are brilliant. Lots of fiddling to get them right but it means you can pose the feet however you want. I recommend building supporting the "sole" section of the foot at the angle you want it at before attaching the toes. In this case a roll of masking tape gave be the required height. I wanted to show Alpha placing its left foot down and is about to transfer its weight flattening the foot and taking the next stride. Beta is more extreme as we will see later.
You can just see the cabling attached to the turbo laser. These gave me one hell of a hassle this time around. All of the supplied cabling snapped while I tried to bend it. In the end I scavenged bin ends of the previous titan's cabling and managed to use those. Christ alone knows what was wrong with these ones. Maybe it was too blummin' cold in the workshop. Who knows?
While it is tough to see the dust weathering on the legs came out really, really nicely. I'm using a new - for me - system of enamel weathering paints from AK Interactive. I misted them on in layers with the airbrush until the dust had built up. A mix of Dust Effects and Kursk Earth (which as a 2000AD fan I kept reading as Cursed Earth) made a nice concrete dust effect to match the urban basing that I have done for all of this client's other models.
More AK effects give us the nice streaking grime under the brass edging. I'll do a tutorial on how this stuff works soon as I am pretty much competant now.
And finally, more AK stuff in the form of rust streaks run around the dome rivets and then 'stumped' with white spirits. Again, I'll talk more of these soon.
Beta is a bit more mucky, with more weathering powders used on the carapace. I've already shown lots of piccies of Beta before so I shall let this image of it's weathered state do it!
Finally, I played around with some photoshop trickery to accomodate another client request. For his titans to be actually stalking around some ruins:
I've done three, the other two are below. I'm not sure which I like best! What do you folks think?
So that is it, titans done! Next is finishing off the Purple Marines project in the form of six yes, you heard me, six predators and a few land speeders! Apparantly won't be the only titan commission though as there is another chap intrigued by the thought of a PVP titan of his very own. Until next time folks
TTFN
Tuesday, 26 March 2013
And then there were two!
Hi folks, just a quickee (and overexposed) picture to celebrate something:
The second titan is finished! I just need to do the weathering now. Should be all done and dusted (badum-tish) by Friday when I'll take some serious photos of the pair of brother titans in the hench light tent. Very exciting!
Edit: I've been playing with photoshop and created... this:
I think some fun photoplasty is in their future when they're all finished off.
TTFN
The second titan is finished! I just need to do the weathering now. Should be all done and dusted (badum-tish) by Friday when I'll take some serious photos of the pair of brother titans in the hench light tent. Very exciting!
Edit: I've been playing with photoshop and created... this:
I think some fun photoplasty is in their future when they're all finished off.
TTFN
Labels:
Legio Astorum,
Titan,
Warhound
Wednesday, 20 March 2013
Head-ing on with painting
Greetings folks, I'm back from a fairly long weekend with the Missus. But back I am and am finally making some serious HEADway with the warhound. Sorry, I'll stop that.
I finally figured out what the problem was with painting the second warhound. For some reason - I suspect temporary insanity - I forgot to stop batch painting the entire titan in one go after the steel and blue stage. I was trying to do the edging and details that way and seriously, that is a sure path to soul destroying drudgery! I decided to finish off Pyladii Alpha's head off and then I would have a sense of progress and accomplishment! A more important tip than I might have realised with large multi-element projects.
This warhound we're modelling buttoned up to preserve the internal componants for future Adeptus Mechanicus projects. As a result I needed to paint the eye windows. During this I was hit by the realisation that THIS would have made a far, far better example for the feathering YouTube tutorial than the lens I used! Doh! I guess I was avoiding using client models for tutorials (this makes no sense either as the axe for the rusting tutorial was a client model). Temporary insanity again, guess I needed that long weekend!
In order to let P. Alpha look a little different to its brother titan, I added the Adeptus Mechanicus cog & skull icon to the forehead. Just place it over the existing decoration, outline the edge with a pencil and then pare away the resin with a nice sharp blade. The icon then blends a little better with the current brass edging. Oh, and the skull was also a nice example for feathering. Darn it!
Anyway, with that I am back on track with Alpha, nifty torso section to follow shortly!
TTFN
I finally figured out what the problem was with painting the second warhound. For some reason - I suspect temporary insanity - I forgot to stop batch painting the entire titan in one go after the steel and blue stage. I was trying to do the edging and details that way and seriously, that is a sure path to soul destroying drudgery! I decided to finish off Pyladii Alpha's head off and then I would have a sense of progress and accomplishment! A more important tip than I might have realised with large multi-element projects.
This warhound we're modelling buttoned up to preserve the internal componants for future Adeptus Mechanicus projects. As a result I needed to paint the eye windows. During this I was hit by the realisation that THIS would have made a far, far better example for the feathering YouTube tutorial than the lens I used! Doh! I guess I was avoiding using client models for tutorials (this makes no sense either as the axe for the rusting tutorial was a client model). Temporary insanity again, guess I needed that long weekend!
In order to let P. Alpha look a little different to its brother titan, I added the Adeptus Mechanicus cog & skull icon to the forehead. Just place it over the existing decoration, outline the edge with a pencil and then pare away the resin with a nice sharp blade. The icon then blends a little better with the current brass edging. Oh, and the skull was also a nice example for feathering. Darn it!
Anyway, with that I am back on track with Alpha, nifty torso section to follow shortly!
TTFN
Friday, 8 March 2013
Turbo Lasers and Colour Theory in action
Hello to one and all. Just a quickee today showcasing the turbo-laser destructor of Pyladii Alpha and along the way, showing that colour theory is more important than you think!
That's a turbo laser! And what a stupid name that is by the way. Turbo-laser destructor. It almost beats bloodstrike missile. Almost. I mean what does it mean? That the laser is turbo charged? That the laser is faster... than the speed... of... light... no, that can't be it. So is it firing faster? Is that the turbo? But turbo is all about forcing gas into a smaller space to get more power. And what about the third element? Destructor? Sounds like it is destroying the turbo-laser. Enough. The name is stupid but it has hung around since Adeptus Titanicus so I think I can forgive it. Now, "why does this demonstrate colour theory Jeff?" I hear you ask, well, at the moment it doesn't. Consider, however the following picture.
Now compare the weapon on the left with the one on the right. On the left it looks like a toy, the colours look awkward somehow. Why? Because if I had left it there I had broken colour theory. Lets go to the wheel:
The picture on the left uses adjacent colours on the wheel. There is no contrast, and precious little complement. The addition of the brass/bronze gives the opposing colour creating a split complimentary scheme. More on this here. Essentially the message to take home is to think through the scheme before you start as you can run into problems later. In this case I had instinctually known that green would work in the scheme (I've been doing this a while) but by the time I got to the picture on the left I was starting to worry that I had made a mistake. It just didn't work. A quick glance up at the colour wheel on my wall keeping the overall plan in mind reassured me. Once the orange/brown metallic shade was in place the blue and green would be complimented. If I didn't have this knowledge and the tool of the colour wheel then I might have changed course mid way through wasting time and possibly having a worse finish at the end. Lesson learned.
While we are talking about this I should mention the green! While musing on the colour scheme for this weapon I had done my usual internet meanderings and had found this on Spikey Bits. I liked the idea of not having just plain steel tubes running through the middle but thought that the linked example was a little too cartoony for me and didn't serve to explain how the weapon worked. It was just lightning for lightning's sake. For Pyladii Alpha I figured that making the tubes look like they contained some sort of highly charged plasma cloud, I picture it flashing into light when the weapon fires. Yeah, I know the physics doesn't exactly stack up but there you go! To achieve this I first airbrushed a series of different diffuse clouds in white over the black undercoat to achieve a greyscale cloudy effect. Then I painted white lighting on it fading out at either end to indicate that it was simply passing out of sight rather than petering out. Then I airbrushed green ink over the result and left it to dry. Inks are perfectly translucent and thus simply tint the greyscale below and are therefore perfect for this role. I repainted the brightest areas of the lightning in white and resprayed with green ink. A thin coat of water effects finished the deal. More titan stuff after the weekend folks!
TTFN
That's a turbo laser! And what a stupid name that is by the way. Turbo-laser destructor. It almost beats bloodstrike missile. Almost. I mean what does it mean? That the laser is turbo charged? That the laser is faster... than the speed... of... light... no, that can't be it. So is it firing faster? Is that the turbo? But turbo is all about forcing gas into a smaller space to get more power. And what about the third element? Destructor? Sounds like it is destroying the turbo-laser. Enough. The name is stupid but it has hung around since Adeptus Titanicus so I think I can forgive it. Now, "why does this demonstrate colour theory Jeff?" I hear you ask, well, at the moment it doesn't. Consider, however the following picture.
Now compare the weapon on the left with the one on the right. On the left it looks like a toy, the colours look awkward somehow. Why? Because if I had left it there I had broken colour theory. Lets go to the wheel:
The picture on the left uses adjacent colours on the wheel. There is no contrast, and precious little complement. The addition of the brass/bronze gives the opposing colour creating a split complimentary scheme. More on this here. Essentially the message to take home is to think through the scheme before you start as you can run into problems later. In this case I had instinctually known that green would work in the scheme (I've been doing this a while) but by the time I got to the picture on the left I was starting to worry that I had made a mistake. It just didn't work. A quick glance up at the colour wheel on my wall keeping the overall plan in mind reassured me. Once the orange/brown metallic shade was in place the blue and green would be complimented. If I didn't have this knowledge and the tool of the colour wheel then I might have changed course mid way through wasting time and possibly having a worse finish at the end. Lesson learned.
While we are talking about this I should mention the green! While musing on the colour scheme for this weapon I had done my usual internet meanderings and had found this on Spikey Bits. I liked the idea of not having just plain steel tubes running through the middle but thought that the linked example was a little too cartoony for me and didn't serve to explain how the weapon worked. It was just lightning for lightning's sake. For Pyladii Alpha I figured that making the tubes look like they contained some sort of highly charged plasma cloud, I picture it flashing into light when the weapon fires. Yeah, I know the physics doesn't exactly stack up but there you go! To achieve this I first airbrushed a series of different diffuse clouds in white over the black undercoat to achieve a greyscale cloudy effect. Then I painted white lighting on it fading out at either end to indicate that it was simply passing out of sight rather than petering out. Then I airbrushed green ink over the result and left it to dry. Inks are perfectly translucent and thus simply tint the greyscale below and are therefore perfect for this role. I repainted the brightest areas of the lightning in white and resprayed with green ink. A thin coat of water effects finished the deal. More titan stuff after the weekend folks!
TTFN
Labels:
Colour Theory,
Painting,
Titan
Thursday, 7 March 2013
Tutorial: Heat discoloured metal
Greetings shipmates, today we have a quick tutorial about getting that multi-coloured discolouration you often see on motorcyle exhausts. The reason this came up was this beasty:
That is the inch and a half wide business end of a warhound titan Inferno Cannon. This thing is capable of incinerating dozens of the enemy with every burst so it had to look serious! The picture above is the final effect incorporating soot, oil and other muck. The first step was getting the metal to look regularly heated.
When you look at the spectrum of colours on heat discoloured metal it is emphatically not the normal EM spectrum rainbow beloved of children's paintings. Instead, the colour rolls from brownish yellow, through purple-ish red and into blue. To create this effect I used an array of washes, starting with a very thin glaze of Seraphim Sepia. I used the trusty hairdryer to cook each layer in order to speed up the process. A second feathered glaze of Sepia firmed up the colour. Each layer from here on in covers less and less area. Fuegan Orange was feathered on next followed by Carroburg Crimson and Druchii Violet. Finally I used Gulliman Blue glaze to really blue the metal closest to the projectors.
Adding oil and soot was simple, a 3:1 mix of brown and black ink built up in layers creates the thick oily colour you are after. The more layers you put on the less like a stain it looks and the more like a leak. Still need to touch up some of the tank banding in this picture but otherwise its done! The soot was Forgeworld Soot Black weathering pigments flicked on to some odourless thinner (essentially posh white spirits) and then spread out with a dry brush once the thinner had dried out.
While we're talking white spirit lets have a look at the picture above. This is a very simple technique to create a rusty surface rather than the rusted surface that JeffRust creates. I painted AK Interactive's Rust Streaks liberally all over a Leadbelcher basecoat. This is an enamel paint designed to allow various weathering effects over an acrylic basecoat. Once the Rust Streaks was painted on I used a brush soaked in odourless thinner to thin the paint in situ and drive it into the recesses. It is this post-painting manipulation that enamels are good for. They are useless for normal painting. Put it this way, I did this at about 10 this morning. It is now 3.30 and it is still not dry. Use enamels with caution! Anyway, I'll leave you with a view of the rear end of the Inferno Cannon and return to the titan painting!
TTFN
That is the inch and a half wide business end of a warhound titan Inferno Cannon. This thing is capable of incinerating dozens of the enemy with every burst so it had to look serious! The picture above is the final effect incorporating soot, oil and other muck. The first step was getting the metal to look regularly heated.
Adding oil and soot was simple, a 3:1 mix of brown and black ink built up in layers creates the thick oily colour you are after. The more layers you put on the less like a stain it looks and the more like a leak. Still need to touch up some of the tank banding in this picture but otherwise its done! The soot was Forgeworld Soot Black weathering pigments flicked on to some odourless thinner (essentially posh white spirits) and then spread out with a dry brush once the thinner had dried out.
While we're talking white spirit lets have a look at the picture above. This is a very simple technique to create a rusty surface rather than the rusted surface that JeffRust creates. I painted AK Interactive's Rust Streaks liberally all over a Leadbelcher basecoat. This is an enamel paint designed to allow various weathering effects over an acrylic basecoat. Once the Rust Streaks was painted on I used a brush soaked in odourless thinner to thin the paint in situ and drive it into the recesses. It is this post-painting manipulation that enamels are good for. They are useless for normal painting. Put it this way, I did this at about 10 this morning. It is now 3.30 and it is still not dry. Use enamels with caution! Anyway, I'll leave you with a view of the rear end of the Inferno Cannon and return to the titan painting!
TTFN
Thursday, 31 January 2013
A very exciting photograph (for me anyway!)
Yes folks, the day is finally here!
Pyladii Beta is together! I finished off the few detail bits on the legs that were missing and then glued that bad boy together. The posing, despite the problems, seems to work. Beta has a real "come and have a go if you think you're hard enough" vibe. Its brother titan Pyladii Alpha is going to be armed with a titan killing turbo-laser and will be a little lower on its haunches, creeping around forests and skyscrapers to make the kill while its brother attracts attention and shreds shields and attendant infantry. Oh, and if anyone is unsure as to the true scale of these beasts?
Yep, that's a 28mm space marine by his toes. There is still work to be done on Pyladii Beta, namely weathering to really make it a god of the battlefield rather than a toy on a shelf but I am going to do that once Alpha is finished so that they match and look like they are on the same battlefield.
Anyway, me and Mrs PVP are off to the in-laws for a long weekend, so there won't be any "Today I've mostly been" until Tuesday. Have a good weekend, shipmates.
TTFN
Pyladii Beta is together! I finished off the few detail bits on the legs that were missing and then glued that bad boy together. The posing, despite the problems, seems to work. Beta has a real "come and have a go if you think you're hard enough" vibe. Its brother titan Pyladii Alpha is going to be armed with a titan killing turbo-laser and will be a little lower on its haunches, creeping around forests and skyscrapers to make the kill while its brother attracts attention and shreds shields and attendant infantry. Oh, and if anyone is unsure as to the true scale of these beasts?
Yep, that's a 28mm space marine by his toes. There is still work to be done on Pyladii Beta, namely weathering to really make it a god of the battlefield rather than a toy on a shelf but I am going to do that once Alpha is finished so that they match and look like they are on the same battlefield.
Anyway, me and Mrs PVP are off to the in-laws for a long weekend, so there won't be any "Today I've mostly been" until Tuesday. Have a good weekend, shipmates.
TTFN
Monday, 28 January 2013
These legs are made for stridin'
And that's just what they'll do...
Greetings shipmates, good lord its been almost a week since I posted here! Shocking, I know, the main reason for this was the snowmageddon Cardiff underwent. Having run out of even basic hobby materials such as primer and being trapped in a rather hilly cul de sac I couldn't do all that much painting. What was I doing instead?
Assembling an absolute ton of resin Eldar vehicles and getting the car through its MOT. Ho hum. But now there has been a thaw, I am restocked and so Titan progress! Hurrah! There are still some details and quality control (checking I haven't got paint anywhere it shouldn't be) to do but we are devilishly close to an assembled titan. Now then, those legs. Oh, dear gods they were a trial. I debated whether to tell this story in public or not but as it can serve as a cautionary tale then here goes:
Note the unusual posture of this leg. I wanted it stepping off anyway and transferring its weight to the front foot but the angle is a little forced, barely noticable as I did a ton of work fixing it but... The reason for this? As I was getting ready to delicately place the shin's ball into the foot's socket joint, nicely lined with good strong superglue, I dropped it. Normally not a problem, this time, huge problem. It had fallen into the socket and instantly glued solid. Backwards and on a wonk. Cue sudden, blinding panic. I tried as much brute force as I dared. Nothing, the surface area of the contact point (being two spheres within one another) was massive. The bond was already beyond my considerable strength. I then spent nearly four hours with acetone and an old brush trying to free the join (acetone kills superglue's bonds y'know). Utter failure. I couldn't get the acetone far enough into the join to free the bottom of the ball. Despairing (remember, this is a clients model, not mine, panic is not a strong enough emotion) and almost at the point of phoning forgeworld and begging them to let me buy the foot and shin of a warhound without the rest of it, I suddenly had a brainwave. I realised that I could saw through the ankle piston and rotate the entire shin until it was at least facing the right way. I could then make the angle work through posing the rest of the leg.
Unfortunately this caused knock-on problems for the whole leg, some caused by the design of the kit itself. You see what forgeworld don't tell you - and for a three hundred pounds kit you would think their instructions would be better right? - is that none of the joins can actually flatten, the pistons just won't connect. There is no way of knowing this until you get further ahead in the process and there is NO warning anywhere. By this point I was cursing ill fortune but was at least thinking "solve the problem". I realised that this was a serendipitous opportunity to add some character through posing. I sawed through the piston and cut some texture into the cut surface to indicate that it had snapped. Either through stumbling on rubble or through the malevolent actions of the enemy Pyladii Beta had snapped the thigh piston of its right leg on this march. To combat the problem the Princeps has locked the thigh and knee sections into a straight line to prevent collapse of the leg. Beta will have a limp but will fight on as a living embodiment of the god machine should!
So the moral of that story? Well, hold on to blummin componants better would be the trite answer, but the real one is: You can always fix the problem. Yes it will cause further complications but you can never know what stories you can tell with those complications. In this case it helped tell the mid battle story of the titan. With the broken cable on the head and this snapped piston Pyladii Beta actually looks like it is mid battle, not pristine on some factory floor. Do I feel like a plank for messing up in the first place? Hell yes. Am I relieved as all get out that I could fix it? Gods yes. But then that is where experiance is the greatest assistant, I've fixed all sorts of problems before and will do so again no doubt. However, in the spirit of forewarned is forearmed I am putting together a little guide to the things forgeworld do not tell you about their models and the ways you can fix the problems and get on with your happy hobby life. Until next time folks.
TTFN
Greetings shipmates, good lord its been almost a week since I posted here! Shocking, I know, the main reason for this was the snowmageddon Cardiff underwent. Having run out of even basic hobby materials such as primer and being trapped in a rather hilly cul de sac I couldn't do all that much painting. What was I doing instead?
![]() |
| picture from "Today I have mostly been..." ignore the Nuln Oil, I was celebrating. |
Note the unusual posture of this leg. I wanted it stepping off anyway and transferring its weight to the front foot but the angle is a little forced, barely noticable as I did a ton of work fixing it but... The reason for this? As I was getting ready to delicately place the shin's ball into the foot's socket joint, nicely lined with good strong superglue, I dropped it. Normally not a problem, this time, huge problem. It had fallen into the socket and instantly glued solid. Backwards and on a wonk. Cue sudden, blinding panic. I tried as much brute force as I dared. Nothing, the surface area of the contact point (being two spheres within one another) was massive. The bond was already beyond my considerable strength. I then spent nearly four hours with acetone and an old brush trying to free the join (acetone kills superglue's bonds y'know). Utter failure. I couldn't get the acetone far enough into the join to free the bottom of the ball. Despairing (remember, this is a clients model, not mine, panic is not a strong enough emotion) and almost at the point of phoning forgeworld and begging them to let me buy the foot and shin of a warhound without the rest of it, I suddenly had a brainwave. I realised that I could saw through the ankle piston and rotate the entire shin until it was at least facing the right way. I could then make the angle work through posing the rest of the leg.
Unfortunately this caused knock-on problems for the whole leg, some caused by the design of the kit itself. You see what forgeworld don't tell you - and for a three hundred pounds kit you would think their instructions would be better right? - is that none of the joins can actually flatten, the pistons just won't connect. There is no way of knowing this until you get further ahead in the process and there is NO warning anywhere. By this point I was cursing ill fortune but was at least thinking "solve the problem". I realised that this was a serendipitous opportunity to add some character through posing. I sawed through the piston and cut some texture into the cut surface to indicate that it had snapped. Either through stumbling on rubble or through the malevolent actions of the enemy Pyladii Beta had snapped the thigh piston of its right leg on this march. To combat the problem the Princeps has locked the thigh and knee sections into a straight line to prevent collapse of the leg. Beta will have a limp but will fight on as a living embodiment of the god machine should!
So the moral of that story? Well, hold on to blummin componants better would be the trite answer, but the real one is: You can always fix the problem. Yes it will cause further complications but you can never know what stories you can tell with those complications. In this case it helped tell the mid battle story of the titan. With the broken cable on the head and this snapped piston Pyladii Beta actually looks like it is mid battle, not pristine on some factory floor. Do I feel like a plank for messing up in the first place? Hell yes. Am I relieved as all get out that I could fix it? Gods yes. But then that is where experiance is the greatest assistant, I've fixed all sorts of problems before and will do so again no doubt. However, in the spirit of forewarned is forearmed I am putting together a little guide to the things forgeworld do not tell you about their models and the ways you can fix the problems and get on with your happy hobby life. Until next time folks.
TTFN
Saturday, 12 January 2013
Getting neat lines on big models
Hi there folks, today I thought I would share some more progress on the first warhound (now suddenly Pyladii Beta, more later) along with some advice on painting geometric patterns at this scale. Patterns like:
Now this might seem like teaching egg-sucking to most of you, but all knowledge is new to someone right? There are a few considerations when dealing with things of this scale (for reference, these shin guards are 3 inches tall). First, it is really, really hard to draw a straight line for any distance. There are liner brushes that can help but you'll see sign writers and the like using guides to run their hands along as it is still a bear. Secondly, curved surfaces mess with your perceptions and you will adjust the width of the lines to make them look straight when viewed from that one angle. Thirdly, you will need a few coats to get a nice clean colour and doing that carefully several times will drive you insane. The solution? Tape.
For once, not duct tape (all though that can fix anything except... ducts) but really low tack masking tape. Normally I'll always post you toward the low cost option but this will not be your friend here. The cheaper the masking tape the wonkier the adhesive. It'll either not stick or conform to the contours or it will stick too hard and tear layers of paint off. I use the Tamiya stuff that comes in several widths and is slightly stretchy making it easy to burnish into place. Speaking of burnishing, that is one of those silicone clay shapers there. They are firm but flexible and won't tear the tape or knacker your paint job while being stiff enough to apply some pressure through. You need a really good seal or bad things happen. Now, stupidly I didn't photograph the next step but I made the width consistant by using another piece of masking tape as a spacer and then removed the middle bit. You can always tell at which point I spontaneously start to take tutorial shots right?
So now we can fill our design with cavalier abandon. Shade and highlight it while the tape is on. Don't waste early effort! It is not an infalliable system though and mercifully for this tutorial I made the two classic mistakes (no not entering a land war in asia or going against a Sicilian when DEATH is on the line) with this technique so I can show you them! Yes, that is totally why I did it, I'm all about the education...
With the tape removed you can see nice clean lines as though you've used a massive transfer. The two bubbles show the problems you can run into. The bottom one is inattention, the top is impatience. Lets deal with the bottom one first, the tape was not tightly burnished to the very edge of the rim and paint leaked underneath the tape. You can tell by the strength of the colour and the way it has followed the path of least resistance along the rim. The top one is not waiting for a fraction too long before removing the tape. There was the tiniest bit of wet paint along the edge of the tape and it smudged as I removed the tape. Mercifully, these are easy fixes!
A couple of swipes with the basecoat colour and all is forgiven! You can now go on with the rest of the painting. Notice that I ignored the raised detail while cutting the tape and painting in the yellow. This is why it is important to think through the order in which you paint something. If I had painted the brass after the blue I would have had to carefully cut the yellow in to the already painted details. Doing it this way speeds up the process and cuts the stress down considerably.
Done right? Noooo, there's a ton of weathering still to go, and it is partially for that reason that you won't see too much highlighting on these surfaces. It's fairly obvious on the next panel:
At the moment the blue looks very "flat". There are a couple of reasons for this, first, go easy on the highlighting on something this big as the sheer size will make extreme highlighting look weird. Extreme highlights simulate the light that is actually bouncing from this model in reality! The second is that the weathering will define the details very well and will obliterate a lot of the highlighting making the effort moot.
As an example, check out the eagle and the "parchment" here. The eagle looks realisticly scaled. The parchment looks "painted on". That is deliberate, it can't really be parchment so the engineers have obviously painted it! The eagle is just a clean steel coat with a wash over it and a tiny bit of edging with the original colour. The light does all the rest. The eagle eyed amongst you will have read "Pyladii Beta" on the parchment. Why?
Because I got the chevron the wrong way up on the shinguard and so this titan miraculously becomes Beta rather than Alpha!
In a bit of a plug my Dwarf Rangers along with the accompanying article can be found over on The Beard Bunker. Check 'em out!
Anyway, that's it for today. Hope the tips I've shared helped some of you and until next time.
TTFN

![]() |
| this! |
For once, not duct tape (all though that can fix anything except... ducts) but really low tack masking tape. Normally I'll always post you toward the low cost option but this will not be your friend here. The cheaper the masking tape the wonkier the adhesive. It'll either not stick or conform to the contours or it will stick too hard and tear layers of paint off. I use the Tamiya stuff that comes in several widths and is slightly stretchy making it easy to burnish into place. Speaking of burnishing, that is one of those silicone clay shapers there. They are firm but flexible and won't tear the tape or knacker your paint job while being stiff enough to apply some pressure through. You need a really good seal or bad things happen. Now, stupidly I didn't photograph the next step but I made the width consistant by using another piece of masking tape as a spacer and then removed the middle bit. You can always tell at which point I spontaneously start to take tutorial shots right?
So now we can fill our design with cavalier abandon. Shade and highlight it while the tape is on. Don't waste early effort! It is not an infalliable system though and mercifully for this tutorial I made the two classic mistakes (no not entering a land war in asia or going against a Sicilian when DEATH is on the line) with this technique so I can show you them! Yes, that is totally why I did it, I'm all about the education...
With the tape removed you can see nice clean lines as though you've used a massive transfer. The two bubbles show the problems you can run into. The bottom one is inattention, the top is impatience. Lets deal with the bottom one first, the tape was not tightly burnished to the very edge of the rim and paint leaked underneath the tape. You can tell by the strength of the colour and the way it has followed the path of least resistance along the rim. The top one is not waiting for a fraction too long before removing the tape. There was the tiniest bit of wet paint along the edge of the tape and it smudged as I removed the tape. Mercifully, these are easy fixes!
A couple of swipes with the basecoat colour and all is forgiven! You can now go on with the rest of the painting. Notice that I ignored the raised detail while cutting the tape and painting in the yellow. This is why it is important to think through the order in which you paint something. If I had painted the brass after the blue I would have had to carefully cut the yellow in to the already painted details. Doing it this way speeds up the process and cuts the stress down considerably.
Done right? Noooo, there's a ton of weathering still to go, and it is partially for that reason that you won't see too much highlighting on these surfaces. It's fairly obvious on the next panel:
At the moment the blue looks very "flat". There are a couple of reasons for this, first, go easy on the highlighting on something this big as the sheer size will make extreme highlighting look weird. Extreme highlights simulate the light that is actually bouncing from this model in reality! The second is that the weathering will define the details very well and will obliterate a lot of the highlighting making the effort moot.
As an example, check out the eagle and the "parchment" here. The eagle looks realisticly scaled. The parchment looks "painted on". That is deliberate, it can't really be parchment so the engineers have obviously painted it! The eagle is just a clean steel coat with a wash over it and a tiny bit of edging with the original colour. The light does all the rest. The eagle eyed amongst you will have read "Pyladii Beta" on the parchment. Why?
Because I got the chevron the wrong way up on the shinguard and so this titan miraculously becomes Beta rather than Alpha!
In a bit of a plug my Dwarf Rangers along with the accompanying article can be found over on The Beard Bunker. Check 'em out!
Anyway, that's it for today. Hope the tips I've shared helped some of you and until next time.
TTFN
Subscribe to:
Posts (Atom)