
Showing posts with label Props. Show all posts

Thursday, 26 February 2015

Open Channel 'D'

As long term readers will know, I don't just do miniature painting. More and more I am building physical props and costume. Every now and again I make something cool enough to share here, today is one of those days. Let me take you to a place and time where you could battle THRUSH without sniggering, where a Russian's accent is optional, it's time to find out what Archer is referencing so much. Welcome to the world of the Man From UNCLE...


Or more specifically one particular prop from the show:
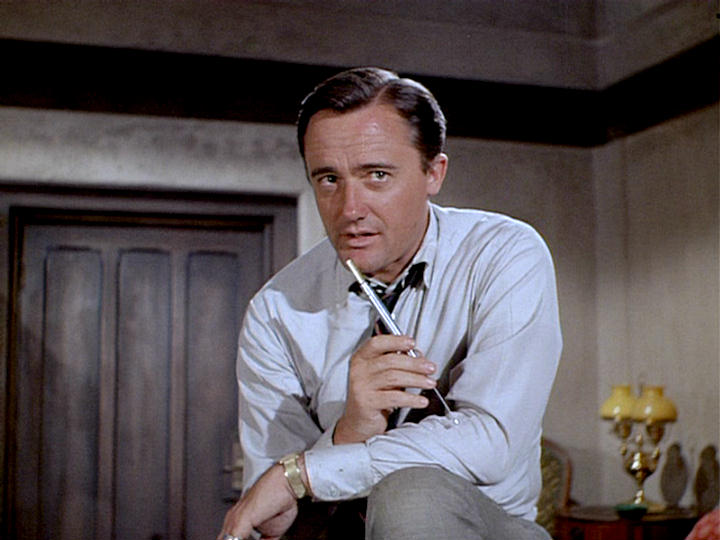

Yep, it's time to whip out a seemingly innocuous pen and convert it into, well, a Spy-Fi cell phone really but this was 1964, with the immortal words "Open Channel D". Has the ugliest ringtone in human creation but is otherwise very cool. I've got a dear friend who was going to a 60's themed LARP in the guise of one of the shows stars, David McCallum's Illya Kuryakin, and wanted a communicator pen to round off the costume. I obliged:


This was a prototype for me so there was a lot of fiddling to get the design practical for home construction. The process started from getting some shots of the original pen from the series:

pics on left result of google search, on right, the sketch I did for the client
As you can see from the picture above (the sketch I sent the client to explain my thinking is on the right), I was trying to figure out whether it would be preferable to have a more authentic remove and reverse microphone end or to just pull off a cap and palm it. The second option would have been much, much easier (just cut and bodge a pen) but we both agreed as much authenticity as possible was better. After a little while longer I realised that no modern pen under £50 was constructed in the way required to pull off the project. I'd need to scratch build out of metal tubing.


Two sizes of steel tubing (12 and 10 mm) from B&Q later and I had the body of it. Steel is a bit of a bear to work with but at 1mm thickness you can cut it with a regular pipe cutter and file away the indented sections. The 10mm tube was selected to telescope within the 12 so a short section of the 10 with a little collar of 12 made for the reversible microphone end. Irregularities in the pipe had the bonus of allowing the sections to lock and unlock by twisting.


More steel tubing - this time 2 and 3mm tubing from Albion Alloys was used for the antenna end. Much easier to work with the Albion stuff, no irregularities, proper quality control. Lovely. The pierced metalwork tube of the microphone caused me a problem but foils from an electric shaver provided an acceptable option. They're not perfect though so I'm continuing to search for a better option. The "pen" end is non functional, it's just a steel cone.


Some finagling with bits off've real pens provided the last of the furniture and there you have it. Perfectly ordinary pen by day, spy-fi cell phone by night. As with all prototypes there are thing's I'd change if doing it again (if I can find a source for pierced metal tubing of the right size - 8mm diameter I'd like to make some more). The microphone needs to change, problems attaching the pen clip mean I'd sandwich it between two layers of the 12mm steel, a few other tweaks... but that's the curse of the perfectionist/obsessive - delete as appropriate. Mercifully there was a deadline so I could just say: "it HAS to be done. It is done."

Hope you've enjoyed this little foray into my other work. More if I get it :)

TTFN

Monday, 18 August 2014

Life-sized Saint's Skull

Heya folks, I know mostly this site deals with inch and a bit high little men but it is not the only thing I paint. Quite often I am fabricating props and costume bits for the LRP game I help run. This time, it was quite a lot of painting so I thought I'd share with the group.


I was making a jewelled skull of a venerated saint for my players to, well, loot... The starting point was an old plastic skull (roughly life size) from the front of a kids anatomy magazine. The whole thing was the colour of the teeth and had a split all the way around the cranium as though lobotomised (there was a brain in a future episode or something). It needed to look a lot more... bony. First I removed the teeth and cleaned all the mould lines from the skull and each tooth. The teeth went to one side and I primed the skull white. Next a basecoat of VMA Hemp was airbrushed over the whole thing. This gave a decent analogue for old bone colour. The sockets and deep shadows were darkened with VMA Camouflage Black Brown and the highlights were just Hemp mixed with white.

At this point I reinserted the teeth and washed some canopy glue (strong but thin PVA that dries crystal clear) into the roots to cement them in place. Once this dried I washed AK Fresh Mud all over it and then sponged it off the high points with kitchen paper damped with Odourless Turpentine. This gives the dirt, the cranial sutures, the plaque on the teeth. Everything in one quick wipe. Finally I acquired some edge trim from a haberdashery (love that word, technically Hobbycraft) which had nicely shaped plastic dangly bits in a leafy sort of shape. These were detached from the trim and hot glued into position to hide the split in the plastic cranium in a laurel-ish wreath. Vallejo Liquid Metal Old Gold coloured any exposed hot glue and gave a nicer lustre to the cheap plasticky gold. A final wash of some reddish-brown oil paints thinned with the odourless turps and the edges wiped down again. Oils take a day or so to dry fully so there is a lot of time for mucking around with it.


I wanted the skull nicely presented but was low on budget. Poking around a cheapy department store called The Range I found a nice little decorative chest. Horrible fabric but decent construction and the right size. Airbrushed black over the fabric erased that faux-urbane pattern and made a sombre reliquary. Needed some work inside though:


Pro-tip, if you want to make something like this yourselves? Scatter cushions are the cheapest source of fancy fabrics and come with the bonus of having all the padding you need included for free. I Evostick-d the fabric into the top edge of the box with a decent amount of cushion stuffing in there to support the skull. Job done!

Hope you enjoyed this departure from the norm, more models next time!

TTFN