Showing posts with label Forge World. Show all posts

Monday, 6 July 2015

Like a Thunderbolt from a clear sky

Yes folks, Project Thunderbolt is done! First, I think some musical accompaniment is needed, crank this up:


Yep, the long running series keeping content on the blog while I batch painted two massive aircraft is finally concluded. We can finally bask in the loveliness that is the Thunderbolt and I'm rewarding myself with a rather generous glass of Pimms (it is summer after all and I'm British). But enough waffle, to pictures of shiny things!


Obviously, I have talked at length about painting these guys so I'll mainly be focusing on the finishing weathering and detail stages and waxing rhapsodic about how lovely these sculpts are. Seriously, I defy anyone to hold one of these in their hands for more than a minute without making it "fly" and murmering "braaaauuuuu dakkkakakka" under their breath. That is the mark of a cool aircraft, vroom noises. Fact. But anyway! Weathering on aircraft is all about restraint, there really won't be a lot of chips and dings that aren't battle damage. Frankly, if an aircraft is flying into something hard enough to chip the paint then that is a sad, sad, crashing plane. So keep the normal chipping to an absolute minimum. Instead, streaks of muck, soot, dust, whatever the plane might have flown through are the best option. Note that while the jets are heat-discoloured, the rear "jet" isn't. That's because I figure the rear nozzle is the rocket motor that Thunderbolts have to break atmosphere (completely wrote "break atmo" in a Firefly reference but figured clear communication over nerd points) and these haven't been fired yet.


On the wings you can see the streaks of dirt, on the dark surfaces it was mostly Ammo Rain Marks streaked on and stumped with odourless thinner. The undersides were more muddy coloured to stand out. I realised I hadn't talked about the decals much as to my decision making process for where they should go. Some were obvious, the numeral and weird sine wave thing were in the classic place that the JG-52 markings were found. The rest needed to have some thought put in. Most of the "label" style decals were scattered around areas that need to be "soldier proof", bomb mountings, ammo storage etc. Things like the little white triangles I figured would work nicely as a targeting point for machine spirits to lock on to the plane when recovering to a carrier. There are a bunch of little steel discs that initially looked like fuel ports but there were way too many. I figured instead they were magnetic cradle clamping points. The triangles allow the cradle machine spirit to target the attachment points.


The business end of the Thunderbolt! Beware all ye that this is pointed at.


And that same business end with the torpedo of significant Jeff-obsession clamped on. The yellow cradle blends so nicely with the nose cone that it could have been designed to go there. Really happy with how that went down. You can see the muddy-toned streaks on the wings and some of the labelling decals if you zoom in on this view.


There have been better shots of the pilots but this final round-up didn't feel right without showing off at least one of them.


And finally, the prodigious collection of ordnance and an example of the basing. The rubble was my normal mix for urban basing, sand, cork granules and Secret Weapon bricks all welded down with thinned PVA. The ordnance was orginally all white (so it would not show up against the pale underside of the aircraft. The red, white and yellow elements would pick up the spot colours on the plane. The bombs though, just looked like toys in white. Did not work. So instead, I pulled the mid grey colour from the fuselage and used that as the ordnance colour. The torpedo got a dark sea blue tone. Torpedoes want to be camouflaged against the dark ocean once fired so a darker tone is appropriate. The ordnance seems small compared to the aircraft (which are huge) but each was like painting a normal 28mm fig (but simpler paint scheme).

And we're done! It's been quite the long haul but I hope you've enjoyed the journey. These now need to be shipped off to the client and long years of happy air-to-mud exploding action.

TTFN

Wednesday, 1 July 2015

Tutorial: Heat Staining Engines

Tagline: Project Thunderbolt - build log part six and a half. 

Yeah, I know, it's no "in space no-one can hear you scream" is it? Today, I present a mini-update because I realised that I had something that I could easily step-by-step and would take up a ton of room in another update. So a tutorial is born!


This is a surprisingly nippy technique, took about 15 minutes to do both engines including stopping to take photos. However you really do need a hairdryer to achieve this time. Leaving ink layers to dry naturally will take approximately forever. Start by lightening the metalwork on the area you need to heat stain. You'll need the brighter steel to show through.


A thin glaze of chestnut ink (all ink layers are mixed with acrylic thinner, in this case Vallejo Airbrush Thinner) over the nozzle is followed by a thicker band. Feather these out a bit - stippling can be helpful too. Check to avoid pools of ink forming. You want a nice clean layer... of grime... you know what I mean.


Next a red and chestnut ink mix was applied to the bottom edge of the "brown band" (seriously, look at reference materials for this.


Then a mix of red and blue inks to create the right purple tone, feather this over the red-chestnut to keep the gradually shading tones.


Next, blue ink is used to stain the very ends of the nozzles (nozzles? Who knows), again feather the blue into the purple.


Finally we get some soot staining with drybrushing first German Camo Black-Brown...


...And finally black. Done!

Now if you are doing this on the polished chrome of a motorbike exhaust, for example, you will want it shinier than this, don't add the soot and put a thin layer of gloss varnish over the staining. It'll pick up the reflective quality of the metalwork beneath. These are old, 40k-ish engines so grime is better.

There y'go, quick tutorial, and just because "why not?" here is a picture of a nifty torpedo:


I think I'm a little obsessed with that torpedo...

Anyway, all for now

TTFN

Wednesday, 3 June 2015

Operation Thunderbolt - Build Log Part Four

Hiiiiiighway through the DANGER-ZONE....


Yep, today it's the turn of the bold pilots to get coloured in. These two are currently called - in my head - by their high gothic callsigns of Mavericus and Anser. These seemed like a nice self contained episode of the build log so a post it is.


With cockpits and the like start from the bottom and work up. In this case, the light grey interior was first, then the seats, finally the pilots uniforms, their faces and then helmets. This way you are always layering the next section over a potentially messy previous one. There's not much to say about the cockpits. I did a suggestion of instrumentation - as frankly there won't be a lot seen - and decided on a light grey interior to help people see the interior details existence through the canopy.


I figured that they needed brown uniforms in order to stand out from the predominantly grey airframe. Note that the outside of the cockpit hasn't been highlighted. That'll come with the rest of the fuselage. The jumpsuits are Val US Field Drab; the straps are Val German Camo Beige; the leather Val Leather Brown. These have been given a wash of Agrax Earthshade and then highlighted first with the original colour and then with a little Deck Tan added.


This shot is very work in progress but I knew that the gloss varnish on the helmet glass would erase the work I'd done making the patterns and colours of the helmets show through the tinted glass effect. Stoopid cameras. You can see it in the flesh but the camera picks up too much of the reflected light. This was achieved by a first applying a basecoat of Val Dark Sea Blue, washed with black. This gives that armoured tinted glass feel. Then to show the colour beneath you thin the paint down and apply glazes of colour to the glass. This allows the helmet colour beneath to "show through" the tint. Worked quite nicely.


Couldn't resist dropping Mavericus into the plane - still a lot more work needed obviously - just to see what he looked like. Badass is my verdict. Then got curious, what would he look like with canopy in place?


Ah, damn near invisible. Never mind, I know it looks cool in there. Now all you do too. :)

That's it for another day.

TTFN

Tuesday, 2 June 2015

Operation Thunderbolt - Build Log Part Three

Hi folks, after the giddy diversion of turning five and four hundred posts it is back to the business at hand. Namely, the Thunderbolts, when last we left them I had got the yellow on (finally) and the first greys. Now we're ready to start the real fun:


Following the guide that came with the transfers (you can just see it to the left) I laid out the pattern for the hard edged "top-down" camo. The masking tape is the Tamiya stuff and is awesome. Very low tack and fairly conformable, note I've added the canopy so as to have a consistent pattern, it comes off again to reinsert the cockpit later.


I found the Basalt Grey to be far, far too close to the Dark Bluegrey in order to work. I added a fair whack of German Grey to the paint and used that instead. Either the RLM colours are different to the Vallejo or the colours used in reproduced pictures are very different. Either way, the new colour works nicely and after all, these are Imperial Navy, not Luftwaffe.


When you remove the tape you are left with gorgeous clean, straight lines to the camo. There really is not any better way to get this sharp effect.Next I needed to get the underside camo sorted. For this I masked around the edge of each of the wings and on any other area that met the underside:


With this done, I sprayed the Pale Grey-blue onto the underside and left it to dry. Again, I think this colour is a little lighter than I was expecting but it seems to work. The idea was to prevent the plane being spotted from below by blending it with the clouds and bright sky above. This done, I stripped off almost all the masking tape.

you can see a tiny patch on the right there where the masking failed but for the most part, perfect.

Nice clean yellow nose emerges, the top-side camo is safe while the blue-white base is neat and tidy. Lovely. Now to move on to the complex lateral camouflage.


The representation of this camo varies, smaller depictions generally just use fuzzy blobs but the actual camo is a series of elegant, almost flame-like patterns blending the pale lower hull and the dark two-tone upper hull. The first stage (2) is to add the Pale Grey-Blue on to the tail and sides. Next (3) is to cut back in with the Dark Bluegrey in order to neaten the pale colours. Finally (4) the German Grey (ish) darker tones are added to finish the disruptive effect. Tricky, but nifty.


At last we can remove the masking tape covering the recognition flash on the fuselage. Unfortunately, all the various layers of paint and the fact that these were the first bits of tape applied meant that there was some bleed-under:


The reason for this was the deep panel lines (far, far deeper than an equivalent 1:48 kit would be) and other areas where the tape couldn't quite mash down. I was initially irritated as it was an evident failure, but it's growing on me, could be re-worked as weathering. Hastily applied recognition flash with cheap paint flaking off.

And there we are. Quite a jump in progress there from last time. Next will either be the cockpits or the metalwork and other details. I'll keep you informed.

TTFN

Saturday, 23 May 2015

Operation Thunderbolt - Build Log Part Two

Hi folks, this update is a smidgeon later and shorter than I had intended, there is a short angry saga to explain this:


The above picture is of the undercoated Thunderbolts, note the white will be where the yellow is going to be. Eagle-eyed readers might spot some yellow on there already... yeah... that is how a crap paint can cost you four clear days of productive work and cause no little fury. Some of you might remember me being excited about Minitaire paints by Badger turning up. This was because the colours were not the usual drab military colours but instead the bright, saturated ones suitable for a lot of 40k stuff. I picked some up as it was literally the only pre-mixed option at the time. I was new to airbrushing and didn't want to mess up the mixes. I also assumed the problems I had were my fault rather than the paints.

I know better now.

Minitaire yellow joins all of the other Minitaire paints I have tried in the bin. No matter what I tried it would not cover properly. They shrank from edges. They pebbled so badly on a second thin coat that it looked like cellulite. I assumed there was a problem with the resin release showing through the primer. I stripped the paint, cleaned the "problem areas" - so I thought - and left them to dry. This takes some time. Then I tried again. The exact same problem. Rage, paints hit bin, strip models again, leave to dry. Buy some Vallejo Game Air Sun Yellow. Which was perfect.


So finally I had the yellow areas coloured. Now to carefully mask them off (almost certainly I'll get some bleed under but it's easier to fix than getting clean yellow over darker tones).


I've burnished the nice flexible Tamiya masking tape over the bits I want to stay yellow and packed the nose. This allows me to put colours on top and keep that nice clean yellow.


Next colour along is Dark Bluegrey a surprisingly agreeable colour and when this settles I'll mask off the camo patterns and get the Basalt Grey on and then the light underside. Honestly thought I'd be there by now. Curse you Minitaire! Curse you!!!!


That's enough of my griping though, we're back on track now. More fun next week!

TTFN

Thursday, 14 May 2015

Operation Thunderbolt - Build Log Part One

Greetings one and all, I'm trying a new approach for this next project. As it'll be a fairly long one I'm breaking up the reporting of it and spreading it over a series of articles as a kind of build log. "What project?" I hear you ask. Well, it's a cool one, a brace of my very favourite 40k aircraft. The Imperial Navy Thunderbolt:


These two have come ready assembled (thank the gods as my tempestuous relationship with Forgeworld's instructions is well documented) but they still need a little work. Mostly cleaning casting plug remnants, mould lines and the main thing the client wants. Bombs. Lots of bombs. Missiles too:


We're using a box of Academy's 1:48 WWII ordnance for the job. 1:48 is perfect for 40k's slightly exaggerated scales - indeed, I think it is the right scale for any "chunky" 28mm figure as the Bolt Action stuff I'm doing indicates. These need to be interchangeable, so the only practical way to go is magnets. However, magnets over such a variety of sizes of hard points and ordnance will lead to problems with fiddly making-sure-everything-is-exactly-the-same-size-and-polarity-itis. I eventually realised that it would be a bit too fiddly. Never mind the inevitable mistake when a magnet gets put in upside down. No. A better way needed to be found and one presented itself in the form of movement trays. You see, lots of people (Maisey of the Beard Bunker included) use magnets in their bases to stick their models down to movement trays to prevent that "we're in a pile at the bottom of the hill boss" formation so popular when gravity gets involved. What do the magnets stick to? Sheets of very thin, self adhesive flexible steel. Essentially plastic impregnated with fine steel filings which leaves it both magnetic and very, very soft. You can cut it with scissors. Or...


If like me you've got one, a guillotine (really useful bit of kit) which will give you perfectly straight cuts no muss, no fuss. I cut 5mm wide strips of the flex-steel - measured to fit the rectangular mounting points on the underneath of the wings. These were then cut to one inch lengths and moved on to the sticking.


The self-adhesion will stick 'em in place just fine but I feared for it's longevity. So after they were all in place (note the extra centre-line mounting for really large bombs) I ran some superglue around the edges. Capillary action will draw it in and seal the edges up nicely. Ought to be bomb proof now (badum-tish). These 0.5mm thick flex-steel pieces will vanish nicely beneath the primer coat and will just look like extra sculpted panels. The idea is that if the client just wants to use them as interceptors the wings will simply look painted. No obvious points of attachment. The magnetised hard points for the bombs and missiles will just snap into place and - hopefully - not leave a mark.


Speaking of paint, the scheme we're going for is an "Imperial-esque" variant of a neat WWII luftwaffe scheme the client found. Looking forward to playing with it. Handily, the transfer sheet came with a colour guide complete with RLM colour values. Five minutes on Vallejo's website found me their equivalences pdf and the correct colours for the greys are found. But that will wait for next time gadget. Next time!

TTFN

p.s. like the idea of seeing more workbench articles? Seeing the process instead of the finished result? Let me know in the comments.

Saturday, 14 February 2015

More Death Korps, and this time, they're blue

Hi folks, another quick update today (the commission I'm working through is several small groups of Imperial Guard officers). This time it is once again Death Korps of Krieg (becoming something of a specialist, them and Legio Astorum titans) only this time, rather than their normal drab khaki, they're a rather fetching blue:


I've said it before and I'll say it again, I love the Death Korps models, they're an example of Grimdark done right. They're whole vibe is so hopeless and faceless and yet simultaneously the models are characterful and most importantly the overall impression is of a professional, regular army. So many IG regiments looked like irregulars or ridiculous peacocks. These and the steel legion that undoubtedly inspired them are soldiers. Not ultra-gothic walking cathedrals, not wild; fanatical desperadoes. No. Just an army. Heck, they've even got backpacks. Love 'em. Were I ever to do another guard army it would be DKK. Although probably a mechanised one as doing a whole infantry horde at those prices? Shudder. Anyway, enough of that, painting:


First up is the lovely radio operator. Colours were taken from a photo of the client's existing army (always tricky to match exactly, so they're kinda "Jeff-matched" colours). The main coat colour is The Fang (blue-grey, #stupidpaintnames), shaded with Drakenhof Nightshade to give it a more blue tone and then rehighlighted first with The Fang then with a couple of mixes of The Fang and Russ Grey. The lining and the trousers both start with Mechanicus Standard Grey. The trousers get a bit of black mixed in to darken it. The coat lining gets highlighted with Dawnstone and the trousers just come back to Mechanicus Standard Grey. The armour is the same as the trousers. All that's left really is the rubber mask (Ammo Rubber and Tires) and the leather (Val Leather Brown shaded with Agrax Earthshade and rehighlighted) and he is done. On to the officer.


This pose is absolutely awesome. The flying - gorgeously sculpted coat - the purposeful stride, the drawing sword, the totally absent face... wait what? Yeeeeah, I don't know if this is a) a miscast, b) difficult to sculpt/cast face in the tiny area available, c) uh, dunno, but there really is not any features under that cap brim. I tried faking it but in the end just minimised it with dark skin and a suggestion of eyes. Ignore the face, ignore it. Another time I might have tried sculpting in the top half of the gas mask to obliterate it. I'd recommend you all do so. But anyway, otherwise lovely model, same paint treatment as the rest of it with the pseudo NMM braid and done.

Hope you enjoyed this whistle stop tour of DKK, more coming soon.

TTFN

Wednesday, 11 June 2014

Inquisitor Huron

Hi folks, yeah, I know, he doesn't look a lot like a pair of rhinos but he got finished first so here he is! This is the second of the Inquisitors for the Inq28 commission (there's a bunch more to come), the first - who I have mentally named Bling-nor of the Hill People - can be found here. Today's entry is a tiny bit more understated:


Yep, that's Forgeworld's Lugft Huron (he's the chap who became the Huron Blackheart, the Tyrant of Badab) remade - a bit - into a servant of the Holy Ordos of the Inquisition. As the second of the Terminator armoured Inquisitors I wanted him to look very, very different to "Inquisitor Bling-nor". That meant a darker, more utilitarian scheme. I'd figured that black would look nifty with red and white/steel accents but another colour was going to be needed. Gold would have been too close to Bling-nor. Highly polished brass though? That would work.


In order to balance the brass colour across the shoulder pads I needed the Crux Terminatus (the icon on the left shoulder pad) to be be a warm yellow/brown. Traditionally though, it's stone (the icon is supposed to contain a tiny fragment of the Emperor's own armour from the Great Crusade). The answer? Marble. One of the brown coloured ones (it comes in all sorts of colours).


I like this model a lot, but the jewel in the crown? That claw. Damn is that claw cool. Eagle style talons paired with the traditional wolverine style lightning claws. So, so cool. It was impossible to photograph but there is Huron's clenched fist visible amongst the talons. Really, really nice component.

With that, we're done for the day. Just the one figure, those tanks are almost there, so nifty tank pics soon.

TTFN

Saturday, 3 May 2014

Inq28 - Elysian Commandos

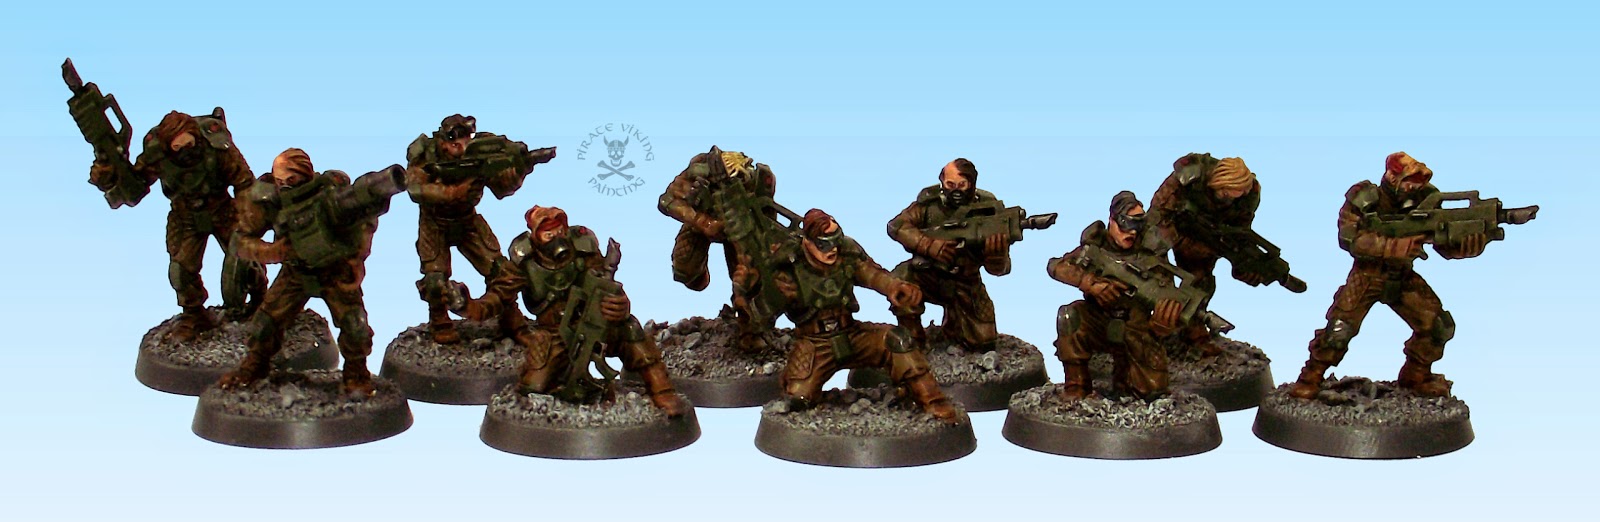
Hi folks, me again, guess what! More Inq28 stuff! This time a squad of guard veterans, Forgeworld Elysian commandos with some replacement female (mostly) heads. Not sure from where, if anyone can let me know?


The conversion of the heads to the forgeworld torsos was fairly straightforward, you do need to cut the necks at quite an angle to fit the collars but they go nicely enough. I hadn't worked with Elysian's before and they're quite nice. I've liked the aesthetic for a while and the models in hand didn't disappoint. Had a few problems getting the arms to match up but that is fairly easily solved with some savage amputations and covering the gaps with greenstuff and the very handy shoulder armour plates which cover a number of sins!


I'd painted a lot of urban cammo'd types recently but these didn't feel like they warranted it. They're commandos, not urban pacification types. If for no other reason than to include some variety I figured I'd switch it up this time. Along with the models the client had sent a sheet of Warlord Games Bolt Action Royal Marine transfers, he wanted me to use the emblems on the girls somewhere. The only place with any space turned out to be the shoulder pads in the end but the transfers sparked an idea for the colours. Val English Uniform is the uniform colour for WW2 Tommys, commandos included and this formed a nice base for the uniform, highlighted with the addition of a bit of Val Deck Tan and shaded with Agrax Earthshade. The leather I chose to be more tan than my usual and so used Val Flat Earth shaded at the same time as the uniforms. Val Cam Olive green armour matched the colour of the WW2 british helmets and gave them a nice overall feel. The RM insignias are tough to see on the photos but are in the centre of each pad.

The heads were a mixed bag, some of them very nice, most with part shaved hair though a couple of them looking more like radiation sickness than "tough-girl" affectation. They changed up the look of the unit nicely though. A little less clean cut than the normal helmeted Elysians.

Well, with that I'm done for today. Fairly straightforward painting leads to fairly short post!

TTFN

Wednesday, 27 November 2013

Corsair Night Spinners

Hello to one and all. Goodness, Corsair posts are like buses aren't they, you wait for ages and then three show up at once. Today a pair of genuinly horrifying weapons, the Eldar Night Spinners:


I remember when they first invented these horrible things back in the old epic scale Space Marine days. They were nasty then and I still think they are nasty now! For those who don't know: Night Spinners/Doom Weavers or whatever else they are called work by spinning a huge web of monofiliament wire - thinner and sharper than cheesewire - and blows it into the air. Eventually, over it's target it spreads and descends like a parachute cutting through anything in it's path and acting as a razor edged net trapping those imprisoned within. Very, very unpleasant and quite out of character for the normally very neat and precise Eldar! Perfect for the slightly more hardcore corsairs though...


As has become traditional for this army they look better in person than in pictures! The spinnarettes on the barrels of the guns are the business end of the weapon system and I knew I didn't just want them to be solid wraithbone. This had me scratching my head for a few minutes conjuring the "look" that I was picturing inside my mind. I figured that watching the weapon build to firing would be like watching candyfloss (cotton candy for those over the pond) be produced at the fairground. I pictured clear windows through which you see a cloud of whipping fibres coil together and spin around. Once there are enough of them they can be blown out of the end. To keep the turquoise spot colour consistant with the gems (and I am loving painting turquoise gemstones by the way) I painted the glass a dark shade of Stegadon Scale Green and used Thunderhawk Blue to indicate the twisting fibres within. A thin layer of wet effects left a nice glassy effect.


The finished effect is quite nice. I was worried that the bone weapons sticking out the top would unbalance the scheme but I needn't have worried. The pale tone minimises the impact of the gun and makes them seem lighter and thus not top heavy. Don't ask me why it works, it just did! Well, next on my workbench are a trio of rather lovely Wasp Assault Walkers so they'll be up probably middle of next week. Until then:

TTFN