Monday 27 February 2012

Tooltime - part 3 (Finishing)

Go to Tooltime - part 2 (painting)

And so at last we reach the end of our hard hat odyssey with the third and final part of Tooltime, today, it's all about finishing touches.


For me there are three elements to finishing off a model, transfers (decals), weathering and basing.


These two are the two big guns in my arsenal when it comes to transfers. Rather than go over their utility here I shall point you to the tutorial that I did a while ago and move along!

Once you have your transfers in place you can start with the weathering (if the model needs it). Most of the weathering that I do is performed with a brush and regular paint (see here for a tutorial) but just recently I had a few new toys turn up.


The first toy is this collection of weathering powders. I chose the Forgeworld ones because, bizarrely, they are some of the cheapest on the market. Now I am not going to pretend to be an expert on these as I have only just started using them. From what I have seen so far, you need to use them sparingly, be very, very careful about getting water on them as it turns them into paint and mix them together for transitions as they don't blend terribly well. Below are two examples of where I have used them recently.


I used a light dusting of Light Earth to enhance the tarmac texture of the road and Aged Rust on the manhole cover on the Hellboy figure. The Sorcerers cloak was an attempt at blending multiple earth shades to get a convincing dirt texture. Both look fairly nice!


The next new toy is a set of enamel weathering products and a pot of odorless turpentine. These enamel paints are handy for us because they can be feathered out with the turpentine without affecting the acrylic coat below. As a result you can get some very interesting effects. Check out the AK Interactive blog for some expert examples of what you can do with this stuff. The only model I have used these on so far is the sorcerer again:


I splodged generous amounts of Slimy Grime Dark onto the green parts (over a coat of Catachan Green) and then feathered it out with the turpentine to provide a nice realistic slimey film over the whole piece. Really looking forward to playing with some of the others!

Top Row: Modelling Sand, Leaf Litter, Mixed Leaves. Second row: Clump Foliage, Scatter, Grass Tufts, "Wasted Grass" Static Grass. Third Row: Cork boulders, Weed Tufts, Ivy. Front row: "Scorched Grass" Static Grass.

Finally we come to basing! Take a look at the array of products in the picture above. This is just part of my basing collection. Seriously folks you can't skimp on this stuff, it makes the difference between a good model and a great one. Here's a rundown of what you can see in the picture above:

Texture:
  • Modelling sand: my basic "soil" looking tool. Pretty much every model I ever paint has some of this on it! Just glue it down with PVA then when dry wash it with a coat of PVA watered down to the consistency of milk. Once dry, you really have to go it some to dislodge it!
  • Cork boulders: Tiny broken up pieces of cork, a nice analogue for larger stones that aren't slate! Living in Wales I can get hold of slate by just wandering out of my front door but these little cork bits look wonderful. Treat the same way as Modelling Sand.
Grass:
  •  Static Grass: There are two examples of Static Grass in the photo, the baggie in the front is full of normal GW Scorched Grass, the tub at the far right is full of my own mix "Wasted Grass" which is a blend of a few Antenociti's Workshop grass colours to give a more realistic finish. Check out the difference below:
"Wasted Grass"
"Scorched Grass"
  •  Scatter: This is an older form of basing texture only one step up from the old dyed sawdust approach. There isn't much in the way of grassiness but I find it very useful for the smaller Flames of War figures. See below for an example:
  •  Grass Tufts: These are a fairly new idea in gaming. They are essentially pre-glued little tussocks of static grass. I do not believe that they should be used on their own. Instead they should enhance a base that already has static grass on it by adding texture. Below is an example:
 

Shrubbery:
  • Coarse Turf: Essentialy a matrix of fine threads with scatter material glued to it that makes ace little bushes or, in larger pieces, whole hedgerows! You can see a piece of this material in the picture above.
  • Weed tufts and Ivy: Just like Coarse turf and Grass Tufts these are pre-glued textures that simulate realistic foliage. I've used them most on my Warmachine figures so far:
  •  Leaf litter: These are seed pods that look uncannily like 28mm scale fallen leaves! Antenociti do a lovely range of them. I can recommend the "Mixed" and "Litter" pots. Mixed allows you to simulate fresh fallen leaves or trailing plants up buildings as they still have some green colouration. Litter is what is used in the picture above to simulate autumn fall of leaves. Make sure to wash them in watered down PVA to make them stick as they are light and delicate!


There are other tools you can use for basing though, in the picture above are: a big bag of clump foliage for hedges and explosions (more later), some plasticard strip that should really have been in part 1 and some dried roots lifted from my garden as fallen logs. Make sure you pick ones with texture and movement, a stick will always look like a stick. A twisty stick will look like a tree! The following picture gives an example.


I have also painted the log, don't leave it in it's original colours as it will not have the "scale" quality you are going for.


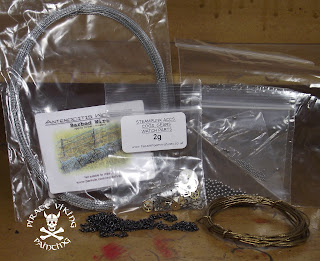
Other bits! Barbed wire analogues, modelling chain, little bits of watches, picture hanging wire for tank tow ropes, steel ball bearings for rivets. All sorts. Keep your eyes open and hoard! It doesn't take much space.


The option above is the most expensive but very effective in certain circumstances. These are cast metal (or resin) bases. Mine come from Black Cat Bases and are mostly urban subjects (I can make organic stuff easily as you have seen! Here are some painted examples:


They give a great effect! I can announce with some excitement that I am preparing a series of tutorials for Black Cat Bases to help others get these effects so I shall link in as soon as they are finished! Anyway. That is all for now, and all for Tooltime for now. I will do occasional Tooltime spots when I get an awesome new toy and feel a desperate urge to share it with you all! Until then.

TTFN.

Sunday 26 February 2012

Tooltime - part 2 (Painting)

Go to Tooltime - part 1 (Modelling)


Welcome to the second in our three part series on the tools that the Pirate Viking Painting Studio (I.E. me!) comes equipped with, today... Painting:


When painting there is one obvious tool you cannot do without (unless you are five and using your fingers) and that is good brushes:


I certainly haven't shown all of the brushes that I own. I have old brushes relegated to glueing and weathering duties, brushes designed for drybrushing, brushes that I don't mind getting enamel paints and turpentine on. But these are my workhorses. They are Raphael brand brushes available from Jackson Arts in the UK and Secret Weapon Miniatures if you are in the States. These really, really are not cheap brushes. Each will set you back at least £5. This is one case where I cannot recommend being thrifty. There are some things that you have to buy the very best that you can afford. These aren't the only premier brushes out there. A lot of people swear by Winsor and Newton Series 7. Experiment and find your niche. The key elements are:
  • Kolinsky Sable: Sable is the sort of Russian weasel that the best brush hair comes from. The Kolinsky Sable is only taken from the tip of the tail where it naturally tapers.
  • A decent reservoir: The biggest error I hear novices make is saying "wow that is detailed, you use a brush with like one hair?". No, I don't, most of my painting is done with a size 0 brush. Highlights are with a 3/0. Eyeballs with a 5/0. You need the hair in the brush to hold paint in the belly of the brush ready to be fed to the tip of the brush like a fountain pen. A good brush will have a point so fine you struggle to measure the thickness of the line.
  • The Test: Before you buy it (or before you use it if you buy online). Take the cover off, moisten the back of your hand and draw the brush along it. Does the hair split into a fishtail? Is there a rogue hair sticking out? Does it curl at the tip? If the answer to any of these is "yes" then reject the brush. You are paying £5 for a stick with some hair at the end. Make sure that you are getting the craftsmanship you deserve for the price.
One exception to the "buy the best you can afford" rule is if you have kids who paint. Don't buy them a Raphael. They will not notice the difference. I wouldn't have until about 8 years ago. Go to a Games Workshop and buy their brushes. They are bloody good for the price and were my brush of choice for the first 20 years or so of painting. There is nothing wrong with them. Just do The Test before you buy as they are more mass produced than the Raphaels.

Left to right: Master's Brush Cleaner; Turpenoid; W&N Brush Cleaner

So, once you have bought your elite, designer brushes you want to care for them right? Brushes are made of hair, your hair needs washing and conditioning to get the best results right? The first and most obvious form of brush washing is water:


Two pots of water in fact. One for metallic paints, one for normal paints. The reason for this is that the metallic paints are made with flecks of aluminium to make them shine. This turns into a suspension in the washing water. Looks beautiful but leaves tiny flecks of metal on random bits of your model from then on. Incidently the next time Vistaprint offer me a free mug I am getting this one:


Heh, heh! After each project though I give the brushes a bit of tlc. I use the Masters Brush Soap to clean out all the little clinging particles of paint from the brush. Then roughly once a month or so they go for bath in Winsor and Newton Brush Cleaner and Restorer. Note the dark colouration. This shouldn't happen! I foolishly let the handles sit in it and it stripped the paint from them too! Trouble with this product is it is really very harsh on the bristles. Strips all the natural oils from them. As a result they need conditioning. You can use regular hair conditioner for this but something in my mind rebelled against this so I bought some Turpenoid brush conditioner. If you do this regimen then your brushes should be in tip-top condition for years. Put it this way. I use my brushes roughly 2-300% more than the casual hobbyist and they lasted a year and a half before I felt I needed to replace them.


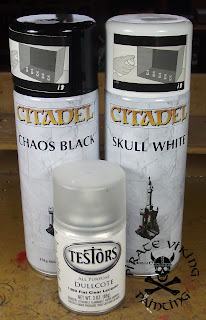
So now we have a good brush we need a good surface to paint upon. Just as an artist prefers a prepared canvas we need to use primed figures. A mistake that novices - and mums of novices - always make is assuming that the spray paint is just a price fiddle. When you prime a model you are not just painting it black or white (or grey, some hobyists swear by grey). You are putting a tough layer of primer that has a bit of "bite" to the surface. Just as you sand a wall before painting it to allow the paint to grip so you also need to prime a model. The Testors paint at the front is actually a Matt varnish and the best one on the market in my opinion. Use this when you have finished a model to protect the paint. Only really necessary on metal models. The paint is tougher than the plastic or resin and so will not chip or scratch.


Finally! Some paint! My choice of paint for 22 years has been Citadel Acrylics. They are wonderful paints and are only getting better with the Foundation and Wash ranges. Forget the internets snootyness. These are brilliant paints.


They are not though the be all and end all. Citadel Acrylics are brilliant at highly saturated, bright colours with a strong tone. They don't do so well with the desaturated military look. Now given that I paint dark and grungey for the most part it shouldn't surprise anyone that I wanted this desaturated military effect! I found it in Vallejo's model colour range. Loads of shades, lots of them keyed to specific uniforms and camo schemes (English Uniform, German Camo Black Brown etc). I now use them a lot. They have their weaknesses. Their metallics aren't quite as good as the Citadel and it is advisable to use Vallejo Thinner medium with the water when thinning them down as they don't react as well to just the water. In consistancy they are quite tarry until thinned but the dropper bottles mean you don't have to gum up your brushes transferring it to the pallette. Oh yeah, Palletes!

A pallette is any suface that you can mix and thin paint upon. I use cheapo small white plates, but I have used tiles, tin foil all sorts. The key thing is that it must not be porous. Ceramic is easy to clean, tin foil can be tossed away at the end of the session. Don't waste money on expensive dimpled palletes. Those are for watercolours. Just buy a 10p plate.


Another Vallejo product that I have been using a lot is Inks. Now this may surprise the people who know me but hear me out. When washes came out they were so wonderful that I turned my back squarely upon the inks and swore never to use them again. Much, much later I discovered that they were the best tool for adding intensity to bright colours and for shading polished metalwork as they didn't dull the finish like a wash does. The key thing is to add Glaze Medium. Also available from Vallejo. This kills the high gloss finish, breaks the surface tension and stops the formation of tide marks. Essentially it turns an ink into a bright toned wash. Very useful but ONLY for the jobs that I have mentioned! Washes still win everywhere else.


The last tool I want to talk about is my colour wheel. Artists tend to have this information plugged into their heads as naturally as breathing. Scientist types like me need to look it up! A colour wheel is the first stage of mastering colour theory (a massive subject for another time). This one rotates, shows complimentary, contrasting and discordant shades, effects of adding one colour to another and the different hues and shades that work together. I got from Jackson Arts but they are everywhere. They really, really help with the designing of colour schemes.

And so we come to the end of part 2! Part 3 will be on finishing, weathering and basing. Until then:

TTFN

Saturday 25 February 2012

How I got in to the hobby

Well then, Warhammer 40,000 is 25 years old. Today is its official birthday. A very happy birthday 40k, you changed most of our lives forever. I thought that this would be a good opportunity to talk about the birth of my own wargaming hobby as it is almost as old!

22 Years ago I was a tiny wee 10 year old Jeff living in a market town called Wisbech in Cambridgeshire in the UK. I had always liked putting models together - a Lego fanatic - and had played about with Airfix stuff. I had heard some of the older kids in the playground talking about this game with Chaos and Orcs and dragons. Then a guy called Daniel Norman gave me this:


White Dwarf 139 has a special place in my heart. I must have read it thousands of times over the years. It had the background for the ancestor of Battlefleet Gothic - Space Fleet - in it, suddenly there was this world of kilometers long starships and space travel in a hell dimension all illustrated with twisted gothic artwork. It contained within it a complete step by step guide to how Mike McVey chose, created and painted the studio's brand new Blood Angels army. This was where they decided that devastators would have blue helmets, that sergeants would have reversed shoulder pads, everything. It was also where a generic blood angels captain got his name. Tycho. 21 Years later I would finally realise the dream I had then of owning that 3rd company army. The nostalgia almost puts a lump in my throat.


We didn't have a proper Games Workshop in Wisbech (still don't) but there was a shop called Prams and Toys that stocked various bits and bobs. Amongst them was this game. Heroquest. This was the first miniatures that I ever legitimately owned. My others had been scrounged from friends. Oddly enough Wisbech was the site of the old Games Workshop plastic manufacturing plant down Weasenham Lane - now Renedra plastics. There was a sort of tradition of "Urban Scrumping" of miscast sprues out of the bins of this place and most hobbyist kids in Wisbech had a few "hot" RTB01 marines in their collections! Heroquest was an odd game, slightly larger in scale miniatures than 28mm and designed by MB and GW together. I enjoyed it but sensed that there was more out there. Then came the day when we were going to London and we would be in Oxford Street. I harrassed my parents until they agreed to find the Plaza store and I saw my first GW. This place was an Aladdins Cave to an 11 year old Jeff. Wonderful. As luck would have it they were having a shop soiled sale and I picked up a copy of Waargh the Orks! cheap and this:

The third edition of Warhammer Fantasy Battle. This was when it was still essentially a way for Roleplayers to use all their models at once. The rules were complex and full of exceptions but the book was magical. It was full of pictures of huge (for the time) armies fighting over actual modelled scenery rather than a dining table. There were stories of dark and terrible things creeping in the hidden places of the world and there was a treasure trove of wonderful, twisted, gothic artwork. I had never seen anything like it. I was hooked and 21 years later I still am.

TTFN

Friday 24 February 2012

Tooltime - part 1 (Modelling)

Welcome to Tooltime!


It occurred to me recently that I toss around a lot of technical jargon and the names of a lot of tools that people new to the hobby - or who just don't shake information loose from the internet as obsessively as I do - may be unfamiliar with. To rectify this I present... Tooltime. I'll show you what I use and more importantly, I'll tell you why, in todays episode, modelling tools. We'll start with the basics:


These are the tools that I find I couldn't live without (plus razor blades). I'll go through them:

Clippers: Ignore what cheapskates tell you, it DOES matter which clippers you get. The important factors are a flat back (I.E. the cutting edge is sharpened like a chisel) like so:

Most electrical clippers are shaped like the example on the right, this creates two wedges that allow the clippers to shear through thick cable easily. Trouble is, imagine two of these surfaces meeting. You are left with a little triangular void. This makes them unsuitable for modelling where the most common application is removing parts from sprue. The cleanest way to do this is by using the flat backed type (the example on the left) and pressing the flat back against the part you want, hey presto! Clean cut, no wierd lumps of plastic to clean up. Another useful feature is return spring that holds the clippers open. This means that you only need mechanical effort to close them and speeds things up immensely.

PRO: There is no tool faster for removing plastic parts from the sprues they are cast on. Leaves clean cuts needing a minimum of cleaning.
CON: The side facing away from the flat back is mangled. This is not a tool to use if you want to seperate two parts and keep them both.

Knife: I use scalpel bladed knives (I'll go over why in a minute) but there are a dizzying array of different modelling knives out there. The three most common are the X-Acto style, the snap off blade style and the scalpels. To my mind, the snap off bladed knives are only useful for scenery, they lack the fine point of a really good hobby knife. The X-Acto style are good but hold the blade in with a chuck that you tighten, this has a tendency to loosen and slip at the worst possible time. Scalpels, on the other hand, are held with a very, very positive lock that will not slip. I use a retractable scalpel (used to be sold by GW but can still be bought from Swann-Morten) with a lovely steel construction. It has served me very well. The blades can be bought in big boxes (Size 10A is my favourite) for not a lot of money so you can always keep your blades surgical sharp. There is nothing more dangerous to modellers than a blunt blade. You have to put much more force into the cuts so that they give way and then the blade goes where the hell it likes.

PRO: Control, thin cuts, excellent for scraping mold lines.
CON: Changing blades is a knack, surgical blades are very, very good at cutting skin. Can be difficult to exert force.

Razors: You can see a plastic box on the table, this is full of single edged razor blades. These are very, very useful for performing chopping motions where force is needed to be applied. Other than that there is no real need for them if you have a good knife.

PRO: Exert force, razor sharp.
CON: No handle, no retraction, no concessions to safety.

Razor Saw/Jewellers Saw: The thing that looks like Sweeny Todd's murder weapon is a razor saw. An ultra thin serrated blade held rigid by a roll of metal along it's back. You can get X-Acto style handles for them but I tend to hold it along the ridge for more control. There is nothing, nothing, better for cutting through metal models in my opinion. Plus, because it creates such thin cuts both halves are preserved. There's no wastage of crushing as there is with Clippers. Highly advised. Buy the smallest teeth you can get and the broadest blade.

PRO: Excellent and easy cutting of metal. Perfectly flat cuts. No wastage.
CON: Limited by width of blade as you have to stop cutting at the ridge.


Pin Vice: Stupid name, it's a hand drill. The name comes from the tightenable chuck designed to hold a long, thin, PIN-like object in a VICE like grip. These are mostly used in conjunction with the collection of thin drill bits for hollowing out gun barrels and other features. They are also used to create holes into which a length of pinning wire can be inserted to create a stronger join between two parts. I'm not going into pinning here, there are loads of good tutorials and it is becoming increasingly unnecessary in these days of light resin.

PRO: Easy to use, excellent control.
CON: Cramp, oh dear god cramp in the hand. Plus going through metal can be tough.

Files: I don't use these often, but when I do they are the only tool for the job. They smooth metal surfaces. That is all.

PRO: Will create perfect joins for supergluing.
CON: Fiddly and awkward for any other job!

Emery Boards/Sanding Sticks: I have a bunch of these in different grits for smoothing cut plastic or for removing unwanted material. There isn't a lot more to say about these! The Squadron Tri-grit is a good starting point and PK-Pro have a lovely range of different grit sticks.

PRO: Variable grits mean you can create perfectly smooth models.
CON: Not suitable for heavy metal work as the sandpaper will eventually rip.


The Chopper II: Gods I love this piece of kit. It only does one thing - makes perfect vertical cuts in plastic parts and plasticard - but it does it AMAZINGLY well. If you need repeated cuts of plasticard or rod of a precise length there is no better tool. It also does perfect 30, 45 and 60 degree mitres. It is esentially a steel table about 10" square with a metal handle that locks a replacable single edge razor. You push down on the handle and it cuts. Simples.

PRO: Perfect square cuts. Precision mitres, easily repeatable results. Beefy build quality.
CON: Cost, it isn't cheap, but it is very, very good. Don't buy it unless you are serious about improving your converting and scratch building.


Rotary Tool: Basically a cheap Dremel. This has really liberated my conversions. I can tear through metal, etch lines and bowls into things, file flat in seconds.There is a problem with fine control and it does have that "rich-man's hand tool" thing going on. I have found it invaluable for my work. You may disagree.

PRO: Quick, effortless, inspirational.
CON: Pricey compared to the hand tools that you will still need, control is an issue.


Safety Gear: Especially if you are using a dremel-esque tool you need protective gear. A small part flung at 5000 RPM will mess you up. Goggles are all you really need but I hate wearing them so I went back to my scientist roots and bought a face shield. It has the advantage of making sure that all of your face is protected and doesn't steam up as much. I also bought a respirator for when using resin and when creating solvent rich atmospheres. Hmmm, solvents....


A range of glues! I'll go through them fairly quickly:

Plastic Glue/Polystyrene Cement (blue bottle): I use the ones with a long metal applicator, the applicator has the prescision you want but clogs from time to time. Easiest way to clear it is to pass a lighter gently along the length until you see glue bubble out the end and a sudden little flame. It is then clear! I've found the humbrol stuff to set fastest and strongest. Polystyrene Cement only glues plastic models, but there is nothing finer for this task.
Super Glue: This is a fascinating chemical, Cyanoacrylate (CA) was developed in the Vietnam war to stick soldiers back together. That is why it bonds skin so fast, it was coincidence that it also bonded pretty much everything else! You can make CA to set in any time you like, you can buy specialist glues timed to the half second. I use Loctite as I like the viscosity and drying time. I am going to stick up for GW here, a lot of people have a real down on their superglue. It is no weaker than anyone elses it just has a longer curing time and needs patience. Think about it, if you were selling a product that bonds skin instantly - unless it has a longer cure time - to kids then what would you do? Super glue is for metal and resin.
PVA: Don't buy it from a modelling shop, go and buy a big bottle of stuff for kids crafts. It is the same and has a much better price:volume ratio. PVA is for porous materials and for basing your models and scenery.
Formula 500 Canopy Glue: A special type of tough, crystal clear drying PVA designed for sticking clear plastic componants down without fogging. Regular PVA does the job but this is the bomb.
No More Nails: Really strong scenery glue. Does a similar job to a hot glue gun but is stronger and more flexible. Dries slowly though.


Sculpting Tools: Through conversations with Steve Buddle and Neil Roberts back when I was working in Truro, Cornwall I learned that EVERYTHING is a sculpting tool if it makes the right shape! I also have an array of steel sculpting doodads. I tend to just use the GW one though as it is ace.

Putty: There are a whole load of different putties out there, I'll go through my favourites:
  • Green Stuff: Technically called Kneadatite, this is a two-part epoxy putty originally designed for plumbing. It has been the gold standard - well green standard - of sculptors for years. It is fairly sticky and elastic but holds a shape very well when it is cured.
  • Brown Stuff (not pictured): Kinda the same as green stuff but a little less elastic, nice for sculpting flowing robes and hair.
  • Pro-Create: Something of a new boy. Also a two-part putty it has been designed for miniatures from the ground up. Less sticky, less elastic and can be sanded to a certain degree. I like this one!
  • Liquid Green Stuff: Read this and then go buy a pot. It will change your world!
  • Squadron Green putty: This is kinda what Liquid Green Stuff would be if made a little thicker and with brain melting chemicals. I used to use it quite a lot but I sense it is going the way of the dodo in my kit.
There are those who swear by milliput or to arcane mixes of different putties. You gotta try different ones until you find one you like. I can recommend Pro-Create though, very good.


Magnets: Teeny tiny little Neodymium magnets have revolutionised modelling. We can have swoppable weapons and easily breakable componants can just be magnetised and then stored in the case. I'll do a full tutorial on these some time but they are wonderful.


Other useful bits, you'll be amazed at what turns out to be vital in your future. In this image we have a bulldog clip (holding transfers down, clipping parts together when they dry etc. Some really low-tack masking tape for creating straight lines when painting. A pencil and permanent marker for planning cuts on models and laying out complex freehand painting. A steel ruler for straight cuts in paper. Some tweezers for manipulating small componants (essentially if you have sausage hands like me) and a lighter for clearing plastic glue blockages and for heating wire to stab into plastic to create little bullet holes.

Well, that's all for this session. Mulder will have his hard hat on again next time for Tooltime - part 2 (Painting)!

TTFN


Sunday 19 February 2012

Sorcerer of Nurgle

And so it begins... The first model of my Nurgle Warriors of Chaos army and it's magic...


Well, a sorcerer at any rate.This charming (if a little drippy) chap is Lothar Pneumophilus, Sorcerer of Nurgle (Nurgle, for the uninitiated is the Chaos God of Plague and Decay) and one of the powers behind my Chaos Lord's throne. The model has had no modifications of any sort as he is a splendid sculpt. The only addition is the wee nurgling chap at the front representing the Warrior Familiar that he has in the list. Painting started with the clothing. I intend to use what I call "Andy Green" - named for Andy of Lair of the Breviks fame - for the main army colour. This colour starts with a basecoat of Charadon Granite so every piece of cloth was basecoated in one go. I intended to use Charadon Granite as the basis for all of the colours on the model to bind it together.

Working on the principle of painting inside to out I first darkened the under-robe down to black with many layers of Badab Black. Then the main robe was worked up to Andy Green. This is done using the following process: Wash the Charadon Granite basecoat with Devlan Mud, rehighlight all but the shadows with Charadon Granite then sequentially highlight first with a 50:50 mix of Charadon Granite and Catachan Green, then with pure Catachan Green. Moving into the high points we then make a 50:50 Catachan and Camo Green mix and follow that with pure Camo Green. Final highlights are with Camo Green and Dheneb Stone. Eight stages. Yes I know that is a lot but it goes quite quickly and creates a wonderful earthy, nurgle-ey green.


I then moved on to the cloak. I wanted a heavy, dark, canvas look to the fabric. Mixing Codex Grey into the Charadon Granite acheived a nice brown-ey grey. I then glazed the finished fabric with a thinned mix Thraka Green and Badab Black. The weathering on the bottom of the cloak was done after all the other steps were finished. I used Forgeworld weathering powders (light earth and dark earth) to add the dried earth. The wetter mud at the edge are a mix of gloss varnish and dark earth and then an edge of Devlan Mud.


The scrolls were basecoated in Dheneb Stone, the bones in Khemri Brown and then both were washed in Devlan Mud. Scrolls were rehighlighted with Dheneb Stone and then with a mix of Dheneb Stone and Skull White. Bones were my usual mix of sequential highlighting through a mix of Khemri Brown and bone all the way up to bone and white.


The staff top is glued together with some nasty, slimey fluid. Ick. Base coated in Catachan Green the ick was then glazed with AK Interactive Slimy Grime Dark. This is an enamel product that allows you to fade out the effect by "stumping" - gradually removing paint - with odourless turpentine. A hit of gloss varnish finished it off and left it with a slimey finish to the entire piece.


The face of the model shows the corruption and noisome foulness of the flesh that lies within. I wanted it to look bloated but bloodless. Normally overweight people are pinker but I wanted him to look ill, really ill. I started from a mix of Tallarn Flesh and Dheneb Stone as a basecoat. Then a wash of Ogryn Flesh and Thraka Green to send him green about the gills. The eye sockets were glazed with Leviathan Purple to make him look tired and the deep recesses were shaded with Devlan Mud. I then highlighted with the original skin mix and then again with a little more Dheneb Stone added. I washed the beard of boils with a couple of thin coats of Baal Red which self highlighted with the top skin colour. The lips were glazed first in Leviathan Purple then with thin Baal Red. A highlight of the skin colour knocks the colour back into the skin to stop it being too bold. A final very thin glaze of Thraka Green finished the skin tone nicely.


The last element to be painted were the maggots (Vallejo Deck Tan washed in Gryphonne Sepia and rehighlighted with Deck Tan) and the Nurgling. The Nurgling was painted with a 60:40 Tallarn Flesh and Catachan Green mix and then highlighted by adding bone to the mix. Deep recesses were picked out with thinned Devlan Mud. The exposed flesh and viscera were glazed with two coats of my blood mix - 4:1 Red Ink to Chestnut Ink. Picking out the bone and black eyes finished him off.

This model effectively sets the colour scheme of the army, add some rust (well, a lot of rust) and this is what the army will look like. I want to add some slushy melting snow to the base to give a nice contrast to the very dark colour scheme but that will have to wait until I buy some water effects. Until next time folks.

TTFN