You need a few things to get the most out of your decals (I use the term decals because it differentiates between what we in the wargames community call waterslide transfers and the dry transfers that a lot of the military modellers use). Tools wise you need: An older brush that you don't care about; A very sharp blade (I use a single edge razor); fine point tweezers; clean water. Then some chemicals: Gloss varnish (I use Citadel 'Ardcoat); Matt Varnish (I use Vallejo); MicroSet and MicroSol (available from modelling shops). Now cut out your decals and make sure everything is ready to go.
Now gloss varnish the entire part that you are working on, you do not want to leave an edge of varnish as this will have the same effect as the carrier film later on. Wait for the varnish to dry (as in go have a cup of tea).
Now put a small puddle of water on the pallete, lower your decal onto the water, you want to float the paper on the waters surface and allow the water to wick up through underneath the decal.
While the decal is soaking (it should only take 20 seconds or so) wet the area to have the decal applied with MicroSet. You can use water but this stuff helps the decal grip to the paint.
Remove the decal paper from the water with tweezers and guide the decal from the paper onto the part with a brush dampened with micro set. Position the decal roughly in place and discard the backing paper.
Manoeuver the decal into position with the damp brush and smooth it down as best you can, make sure the centre is well attached.
Brush more MicroSet over the top to help with decal adhesion.
Draw away excess fluid with a tissue, use the dampened tissue to burnish the decal down.
This is the result that most people get that causes such frustration. Now to cure it, first let the decal dry fully.
Now brush MicroSol generously over the decal and smooth down the edges as it dries. Be very careful at this point as the MicroSol is literally dissolving the carrier film that the decal is printed onto. If you are too rough you will tear or smear the design.
After one coat the decal is already snuggling down.
A second coat leave just the worst folds still showing, we now need to physically correct this as just softening the carrier film will not solve it.
Gently press a sharp blade along the folds to cut the decal film. It must be wickedly sharp (ie new) as you need to cut the film with light pressure on contact. If you have to draw the blade to cut the film you risk tearing the decal or damage the paintwork.
A final coat of MicroSol smooths out the folds and finally gives us a smooth decal. Let this dry completely. Take the opportunity to clear out any build up of MicroSol and MicroSet from the corners to avoid discolouring the paint when we varnish it.
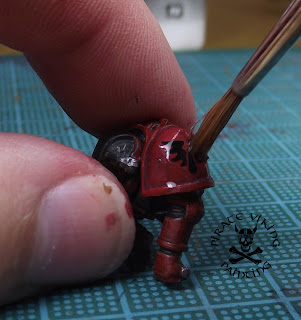
Now to matt varnish the previously glossed area. Use plenty of varnish initially, clean the brush and smooth the varnish out avoiding brush strokes. The picture shows how the process should start not end!
Finished! Varnish all dry and the decal now looks painted on. Hopefully this guide will inspire some of you to give decals a chance on curved surfaces and to help all of you make your decals look painted on regardless of where they are used. Comments and questions are of course welcome as always.
[Even half awake people will have noticed that the models I have used have no legs. This is because they are Land Speeder crewmen left seperate from the vehicle to allow me to paint the cockpit. These are almost finished and will be the subject of my next post]
TTFN!


Excellent tutorial. I use microsol/set but I find that if I put microset on before the decal, if I don't get it in the right place when getting it off the backing paper it is difficult to maneuver. Do you just make sure you get it right or am I missing something?
ReplyDeleteI seriously SUCK at applying waterslide decals, and this might just get me to try again. The pics for each step are a good touchstone for what it should look like.
ReplyDeleteThanks!
Hmm, Tristan, I don't really have any problems there. Use lots of Microset initially and if you need to relocate make sure you break the surface tension by sliding a damp brush under the decal
ReplyDeleteI use a similar method. You've brought to my attention a step or two I could do differently though and I appreciate that!
ReplyDelete