

Once again the squad has been painted in absolutely authentic Blood Angels markings. This time it was an irregular lightning flash on the knee that was giving me grief. The yellow helmets showcase what I call "Military Yellow", this is a muted yet strong yellow tone that doesn't shriek out from the model.

The yellow method is as follows: A couple of thin basecoats of Iyanden Darksun to give a nice solid layer. Then a thin wash of Gryphonne Sepia into the recesses. Once this dries mix up roughly a 2:1 batch of Iyanden Darksun and Skull White, this forms the first highlight. Then edge highlight with a 1:1 Iyanden Darksun and Skull White mix to define the edges of the helmet. I also ran a very little badab black under the lip of the "forehead" and into the eyesockets to make the green gems pop more.
For details we will focus on the sergeant of the squad (sergeants always get the snacky stuff):


As usual, the sergeant is painted with the classic reversed pads. To make the yellow pop it is glazed with Golden Yellow after the same method as the helmet is used. I could go through the method used to paint the axe but to be perfectly honest it is straight out of White Dwarf and they have better pictures and explain it very well. Go take a look. Of greater interest is the jump packs. I am really happy with how the burnt look turned out. Initially I wasn't going to do much weathering work on them, just a Boltgun Metal nozzle and a Badab Black shading wash. Something just did not look right though, they weren't utilitarian enough. So to make it look like they are in constant use I stippled on two drybrushes, first of a 1:1 mix of Scorched Brown and Chaos Black, this covered the largest area and streaked up the outside. Then a second drybrush of almost pure Chaos Black (probably about 4:1 I just added more black to the mix) was concentrated around the exhausts. This gave the packs their nice military look I was going for.

At the end of the weathering tutorial I promised I would get some "Glamour" shots of Magnus - the Second Tactical Squad's Razorback - the next time I had my photo set up together and here they are!
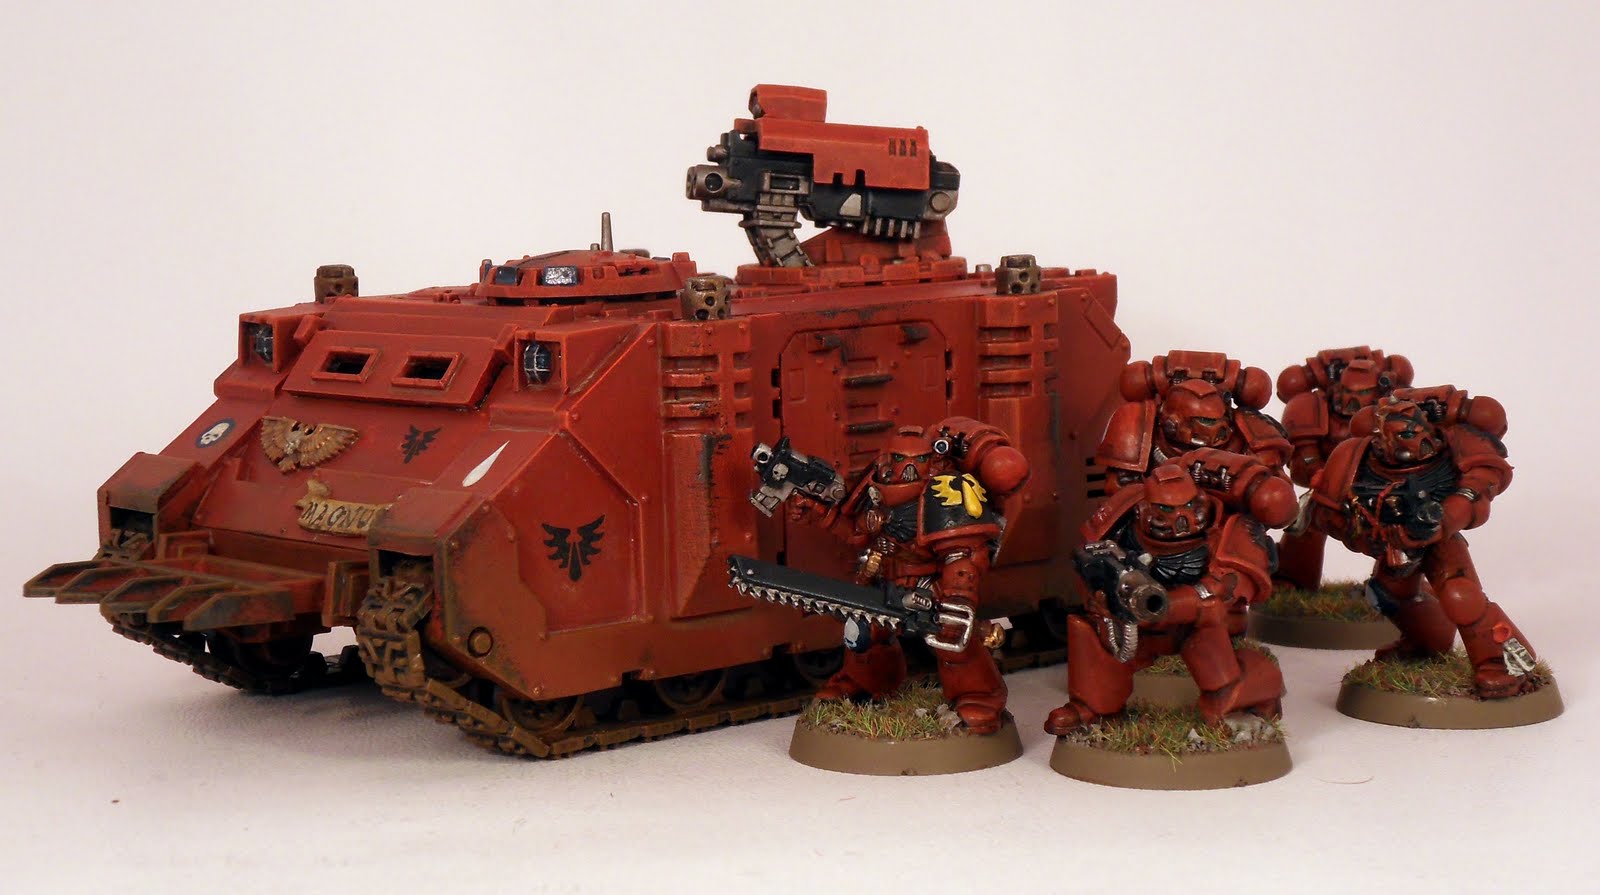
To showcase the importance of weathering in making a tank work as a model vehicle rather than a toy tank (work with me here, its a difficult distinction to explain). Here is a compare and contrast of the factory finish - i.e. unweathered - Razorback and it's battered and abused final form:


I'm sure you can see the difference. The weathered version has a much more... real... finish. I don't know how else to describe it! Anyway, here are some more shots of the finished Magnus, happy painting!
TTFN
Oh, and PS: I have discovered a new author that you might want to check out: MJ Bridger. His Monk Son of Kunlun is an ace first novel. Literally could not put it down for the last third!


No comments:
Post a Comment